The modern field guide to camera-native VR180 and flat 2D/3D delivery: import, calibration, stabilization, color, photos, Timeline editing, export, publishing, CLI, and local DeoVR streaming.
Version 1.0.0macOS + WindowsGPU-firstEnglish edition
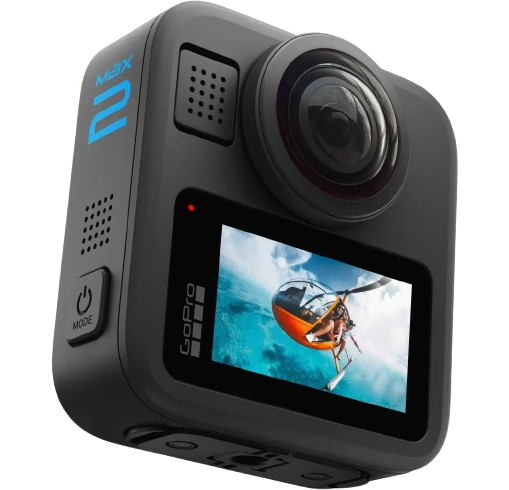
GoPro
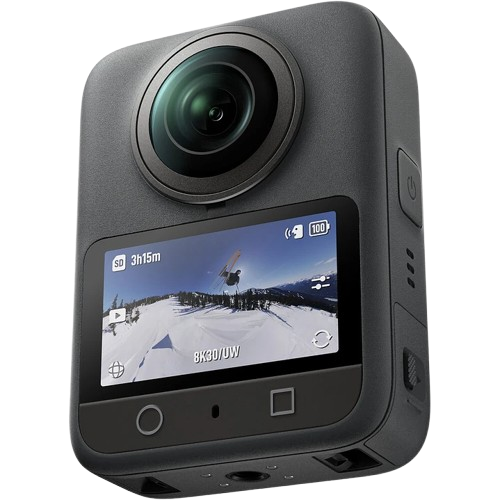
Osmo 360
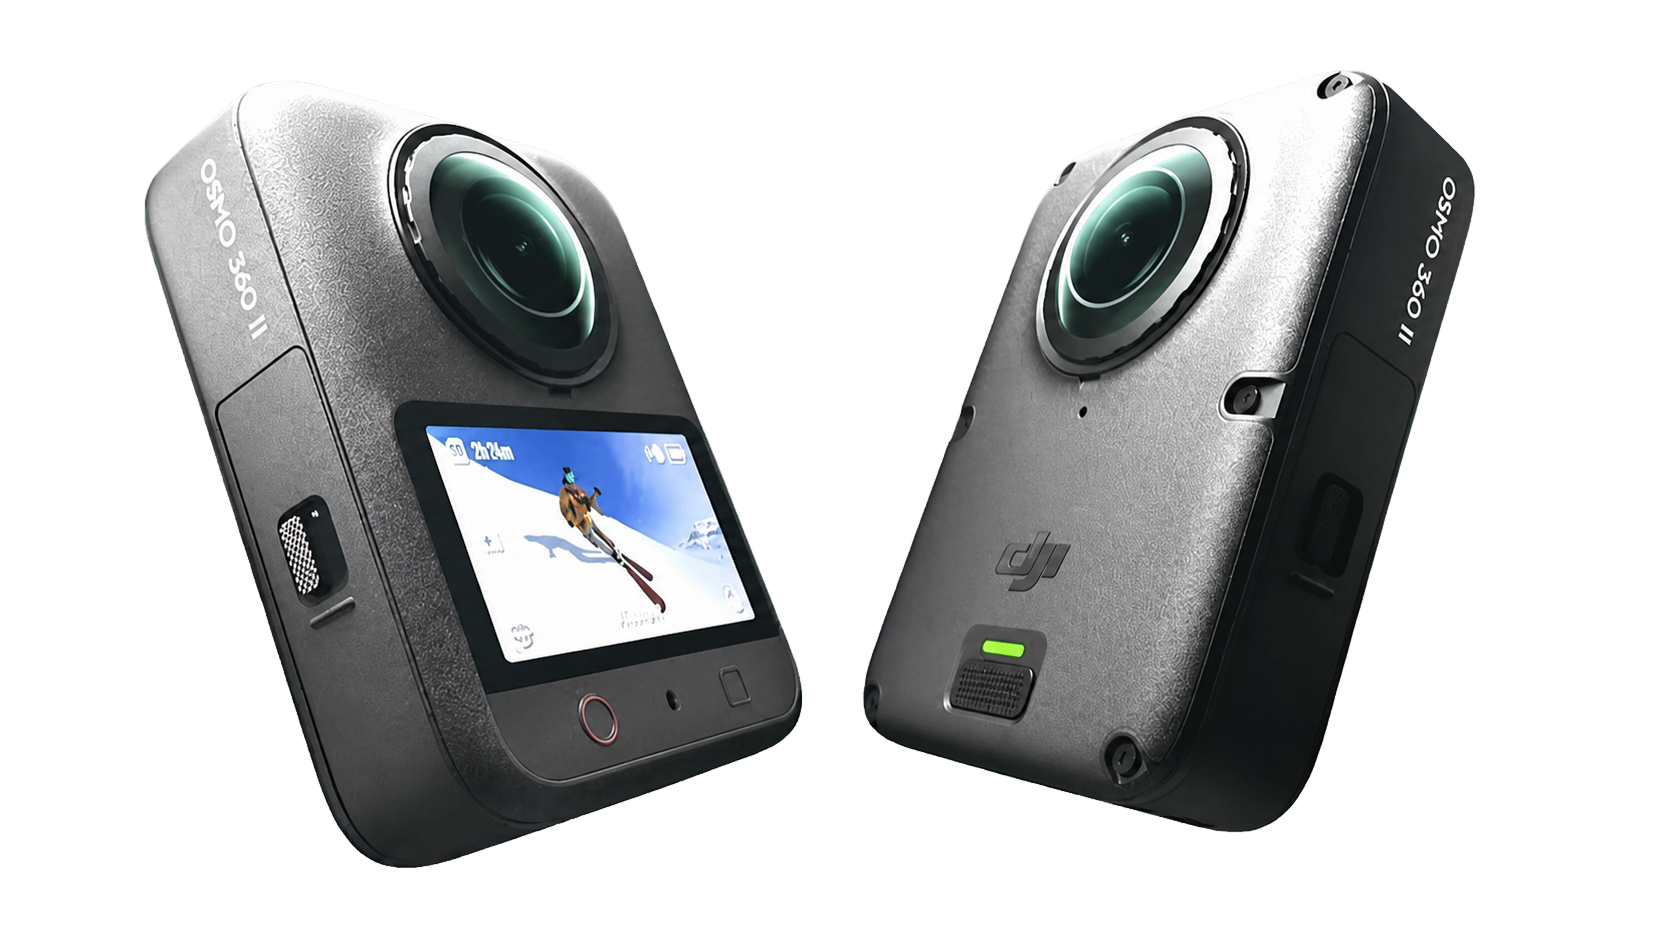
Osmo 360 II
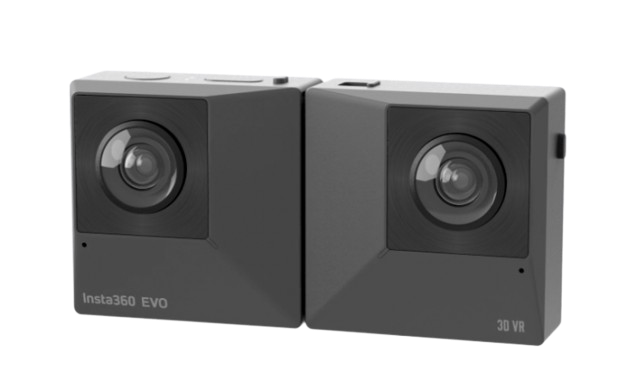
Insta360 EVO
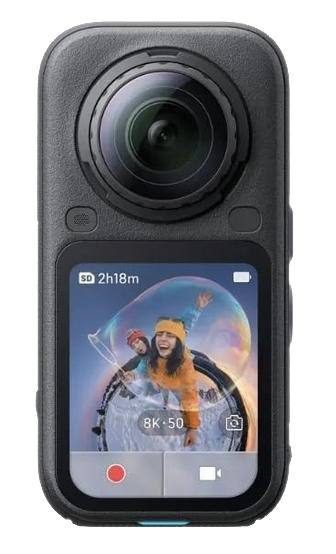
Insta360 X5
Insta360 X6
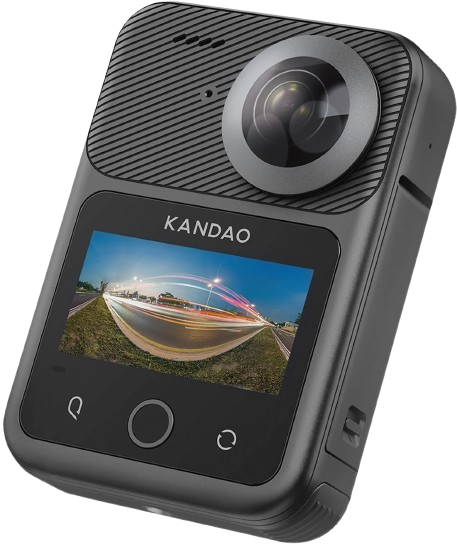
Kandao Q3U
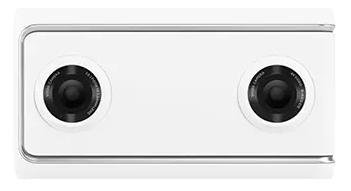
Lenovo Mirage
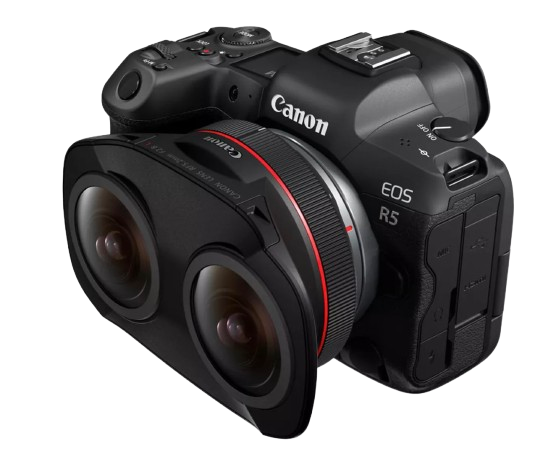
Canon EOS R5 Mark II
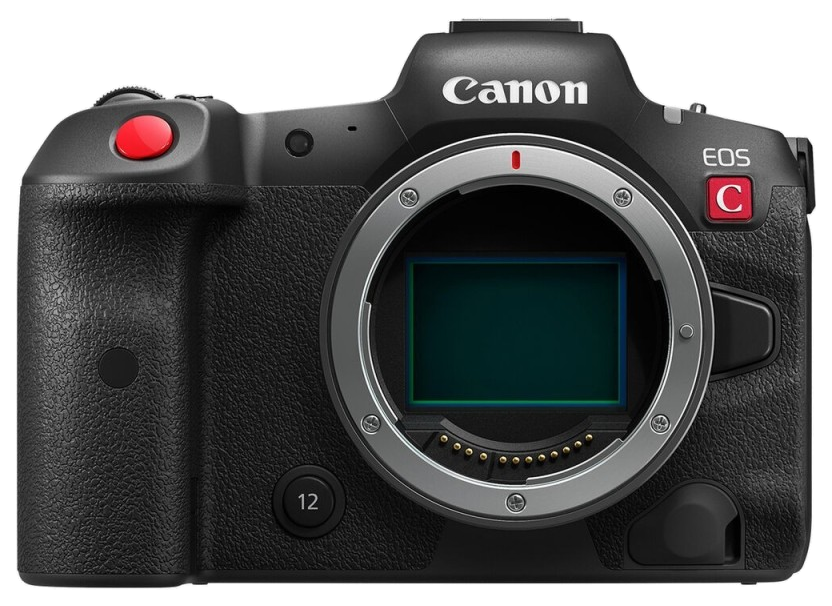
Canon EOS R5 C
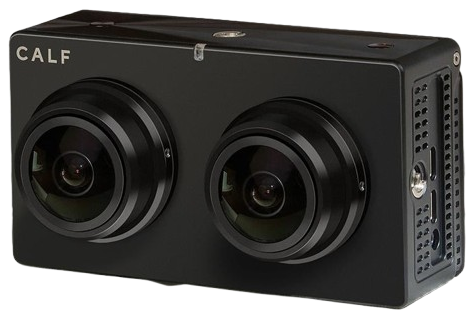
CALF Gen 1
16organized chapters
10real product captures
2desktop platforms
1shared workflow
01
From camera file to polished VR180
Start here
Welcome to VRadical Studio. This guide is your friendly, practical map of the whole app: importing camera media, calibrating stereo geometry, stabilizing motion, shaping the look, editing a mixed-camera timeline, exporting, and streaming to DeoVR.
Preview
Open supported camera originals and inspect the final side-by-side VR180 image on the GPU.
Polish
Calibrate, stabilize, grade color, correct framing, process audio, denoise, and sharpen.
Build
Combine compatible videos, photos, and external audio in a reusable Timeline project.
Deliver
Export VR180, flat 2D or 3D video, and photos; publish eligible immersive exports or stream locally to DeoVR.
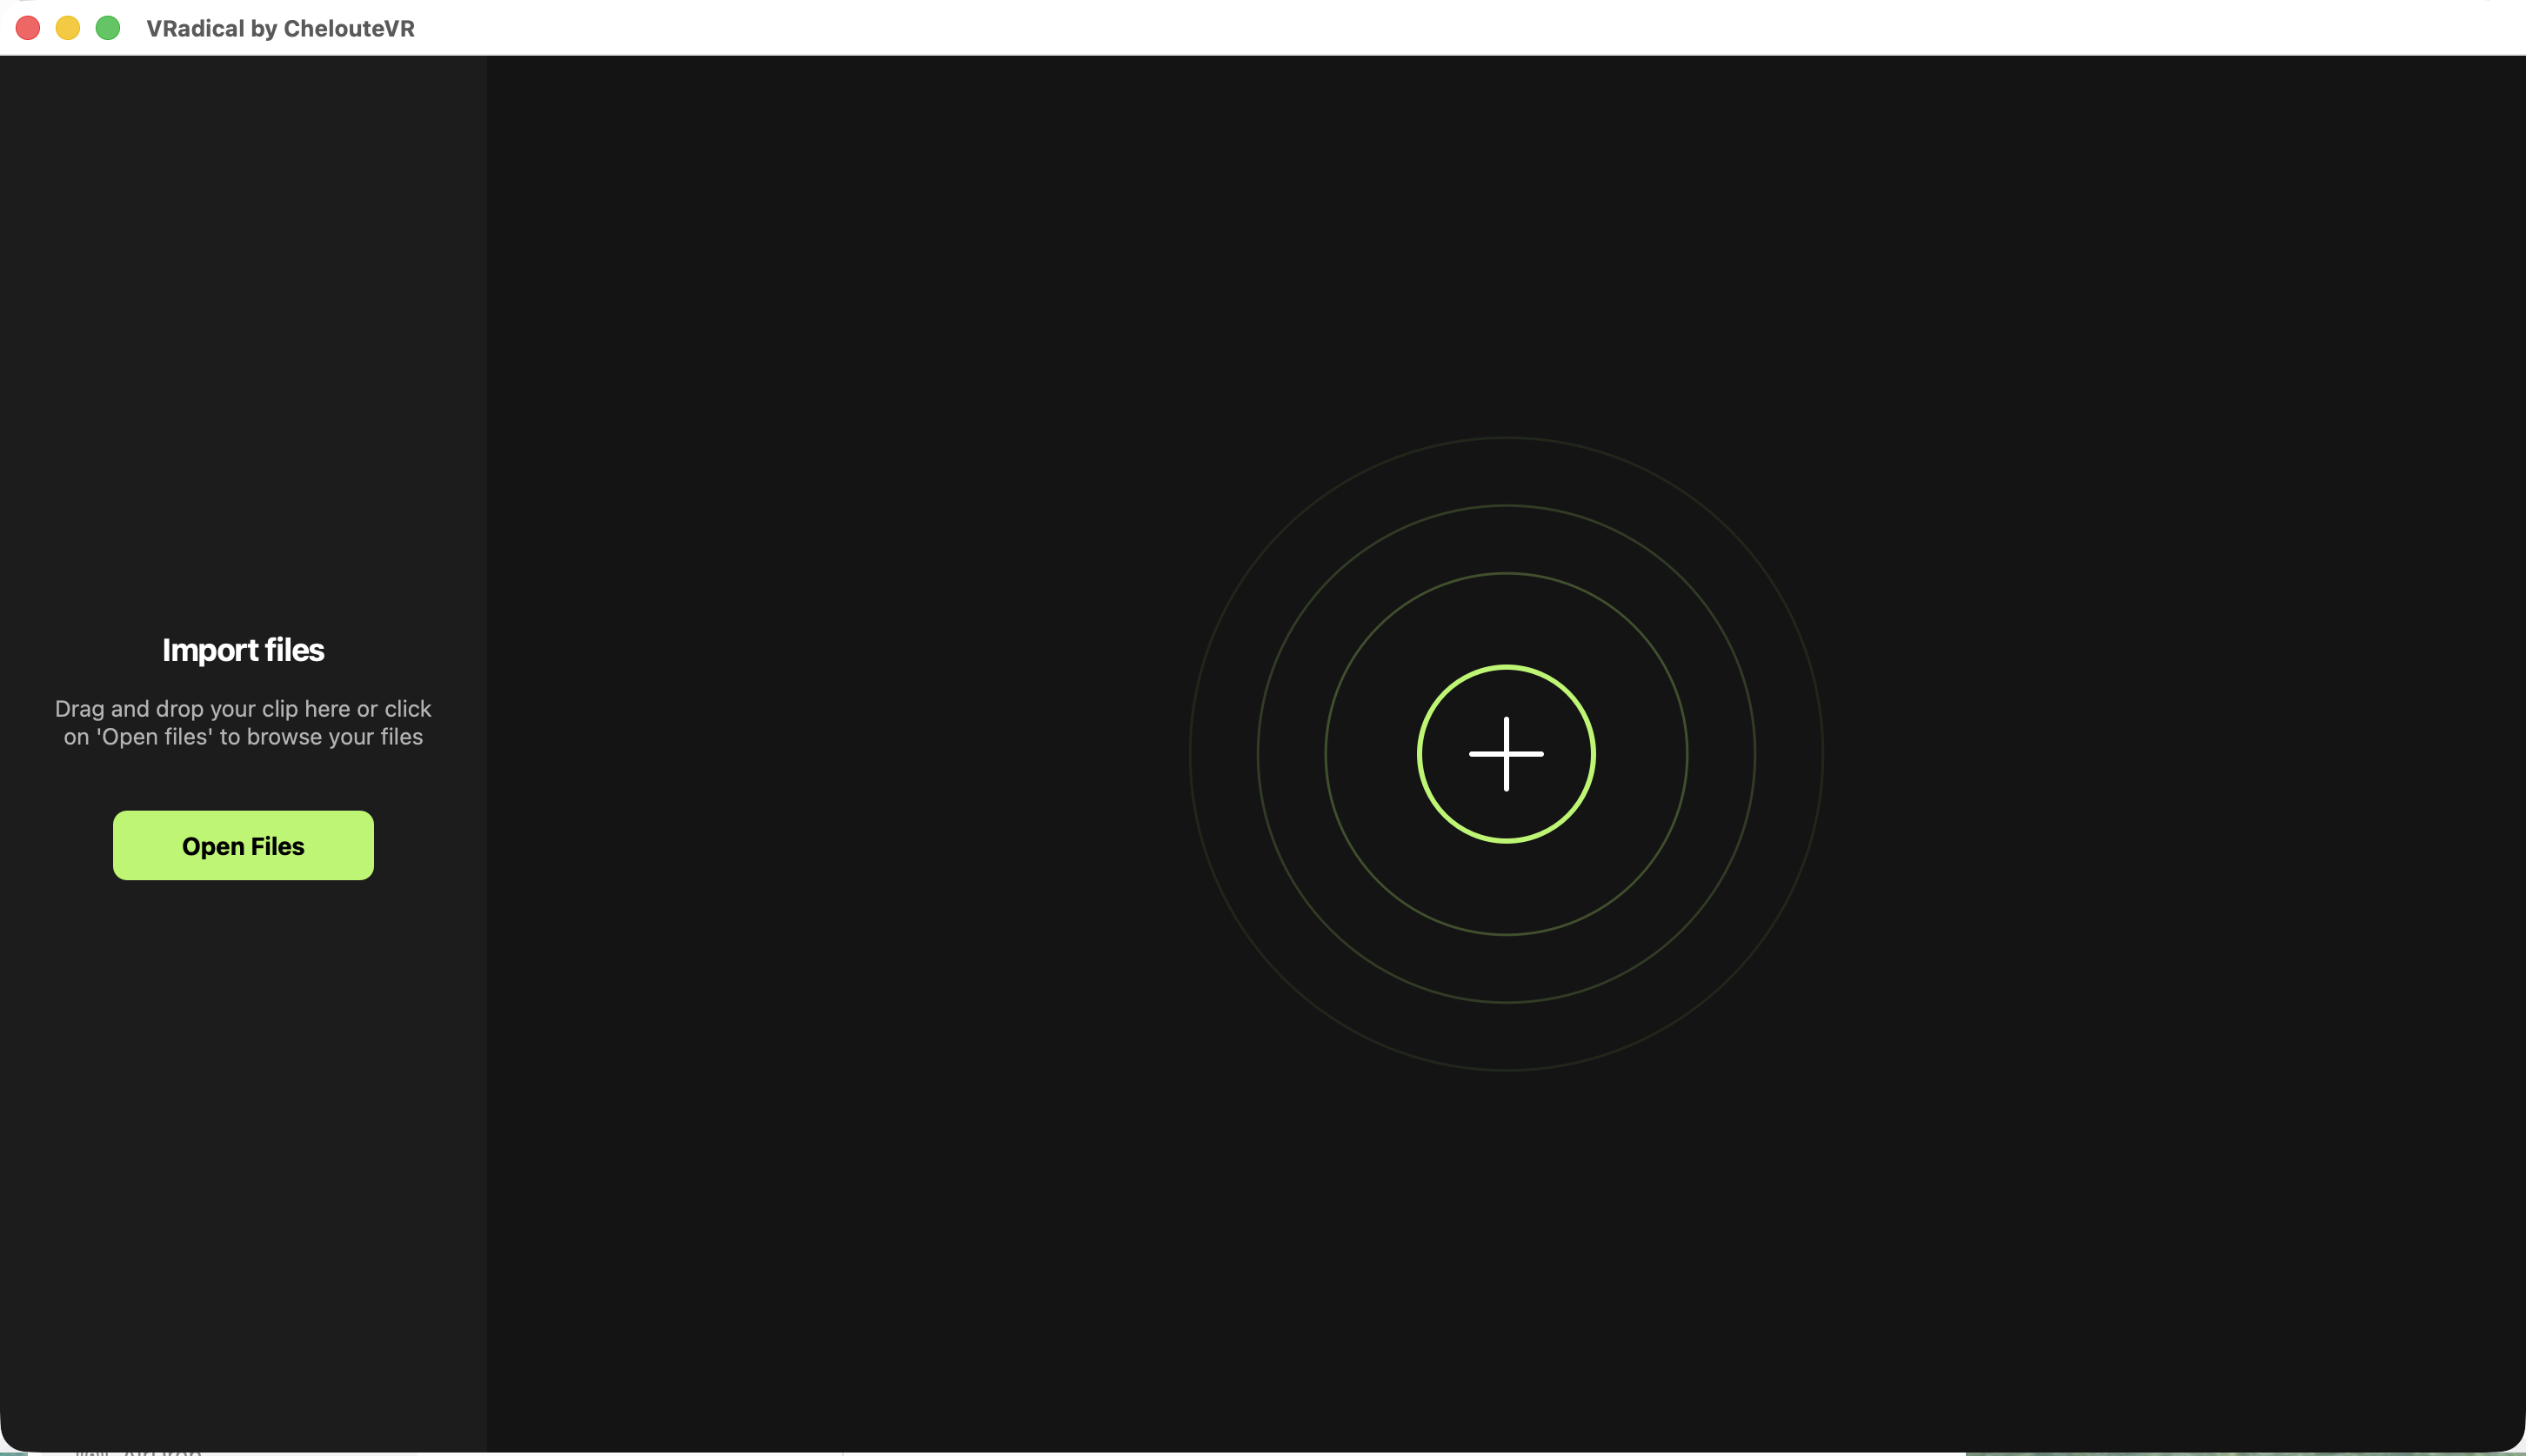
SCREENThe welcome screen. Drop supported media anywhere in the center, or choose Open Files.
Your first ten minutes
1
Launch Studio
Open the application and confirm that it reaches the import screen without a GPU warning.
2
Add media
Drop one or more supported camera files, or choose Open Files. Keep every required companion or segment file beside the selected file.
3
Complete calibration
If Studio asks for stereo calibration or sensor orientation, finish that guided flow before judging the final picture.
4
Choose the motion
Open Stabilization, enable VRadical Flow when needed, then add Lock Vertical Direction and/or Chicken Head Stabilization as intentional modifiers.
5
Shape the image
Open Media Processing for color, LUT, image correction, and camera-specific geometry. Enable RGB histogram when you want to monitor the final left eye.
6
Set a range
Use the left and right bracket controls to mark In and Out points when you only need part of a video.
7
Deliver
Choose a VR or flat projection in Export, build a Timeline, or start a DeoVR stream. A higher export frame rate automatically invokes GPU RIFE interpolation.
A tiny glossary before we roll
Term
What it means in Studio
Camera pipeline
The named parser, preview, stabilization, calibration, export, Timeline, and streaming route for one camera profile.
SBS / VR180
A side-by-side stereo frame: the final left eye on the left half and final right eye on the right half.
Hequirect
Studio's half-equirectangular VR180 projection. It is the usual final SBS view.
Calibration
A persistent camera-specific stereo correction that aligns parallax and must be applied as the final geometry step.
Mod profile
Saved per-camera setup such as sensor rotations, eye order, and focal-distance defaults.
Timeline
A .vradical-timeline project containing explicit video/photo clips, external audio, trims, transitions, and per-clip processing.
Flat 2D / 3D
Rectilinear video delivery: one 16:9 eye for 2D or two 16:9 eyes side by side for 3D Flat.
RIFE
GPU frame interpolation selected automatically when video export frame rate exceeds the source rate.
02
A GPU is not optional here
Install and launch
VRadical Studio is GPU-first. Preview, geometry, stabilization, calibration application, color, LUTs, Timeline playback, and display stay on the native GPU path. Unsupported hardware stops at launch instead of silently reducing quality.
Platform
Required hardware
Install location
macOS
Apple Silicon Mac. Intel Macs are not supported.
/Applications/VRadical Studio.app
Windows
Hardware Direct3D 11 GPU. Non-Apple PCs may use NVIDIA, AMD, or Intel; a physical Apple computer running Windows may use its installed hardware GPU.
C:\Program Files\VRadical Studio
Install on macOS
1
Open the DMG
Use the VRadical Studio disk image supplied for your edition.
2
Copy the app
Drag VRadical Studio into Applications. Keep the application bundle intact because it contains the GUI, CLI, libraries, and calibration tools.
3
Launch
Open VRadical Studio from Applications. If macOS asks for confirmation, verify that you are opening the delivery you received.
4
Upgrade
In an updater-enabled customer build, choose Help > Check for Updates or open Settings > General > Updates. A manually delivered build can still be replaced while Studio is closed.
Install on Windows
1
Run the installer
Open VRadicalStudioSetup.exe. Windows may show an unknown-publisher UAC prompt for the current unsigned installer.
2
Choose the destination
The default is Program Files. The installer can create Start menu and desktop shortcuts.
3
Finish prerequisites
Allow the installer to add the Microsoft Visual C++ x64 runtime when needed.
4
Upgrade
Use Help > Check for Updates in an updater-enabled customer build, or quit Studio and run a newer installer over the existing installation.
First-launch checks
CHECKThe import screen appears and remains responsive.
CHECKNo Apple Silicon or Direct3D 11 compatibility message appears.
CHECKThe version shown in Settings matches the delivery notes.
CHECKYour camera family is enabled in this edition. Camera support is build-specific.
CHECKThere is enough fast local storage for camera originals, exports, and temporary calibration data.
Full version and demo editions
Edition
What you can do
Full version
Use the registered camera and photo routes in this guide, file export and publishing, GPU RIFE interpolation, and DeoVR streaming when the purchased camera family is enabled.
Universal demo
Preview and edit supported camera video and eligible photos, calibrate, use most stabilization and image/audio tools, edit mixed Timelines, and stream to DeoVR. The export settings dialog opens, but submission explains that file export needs the full version. Canon/CALF stabilization and DJI/GoPro photo routes are absent.
Legacy single-camera demo
Only its named camera model's video routes are included. Photo processing, file export, and DeoVR streaming are absent.
03
Explicit support, never a generic guess
Cameras and media
An extension is only the first gate. Studio also verifies camera metadata, the installed camera family, and complete support for the operation you requested. That strictness keeps preview and export honest.
Accepted containers
Family
Video
Photo
Important notes
GoPro
.360
.36p
MAX2 BERS1, BERS0, and Fisheye are distinct video profiles. Supported single-member recordings have Timeline routes.
DJI Osmo 360 / 360 II
.osv
.jpg (Osmo 360)
Both models have distinct video profiles. The registered JPG photo route is for the original Osmo 360. Keep every OSV member together.
Insta360
.insv
.insp, .dng (X5/X6)
Video profiles include EVO, X4, X5, X6, and One R/RS variants. X5/X6 have photo routes; split video needs matching parts.
Kandao Q3U
.mp4, .mov
.jpg, .dng
MP4/MOV support is metadata-validated. Q3U video support currently targets 24/25/30 fps families.
Lenovo Mirage
.mp4, .mov
.jpg
Video and Extended-XMP photo routes require the matching explicit profile.
Canon EOS VR System
.crm
.jpg, .cr3 (R5 Mark II)
R5 Mark II supports video and photos; R5 C currently supports the registered CRM video mode only. Both require the RF 5.2mm F2.8 L Dual Fisheye.
CALF Gen 1
V#######.mp4
-
Optional camera slice. Availability depends on the purchased edition.
Timeline
.vradical-timeline
-
A project references its original media; it is not a generic JSON file.
Video profile coverage
Profile
Preview
Export
Timeline
DeoVR
Calibration
GoPro MAX2 BERS1 EAC
Yes
Yes
Yes
Yes
Required
GoPro MAX Fisheye
Yes
Yes
Yes
Yes
Required
GoPro BERS0 / older EAC
Yes
Yes
Yes
Yes
Required
DJI Osmo 360 dual-fisheye
Yes
Yes
Yes
Yes
Required
DJI Osmo 360 II dual-fisheye
Yes
Yes
Yes
Yes
Required
Insta360 EVO, X4, X5, X6
Yes
Yes
Yes
Yes
Required
Insta360 One R/RS 1-inch H/V
Yes
Yes
Yes
Yes
Required
Kandao Q3U
Yes
Yes
Yes
Yes
Required
Lenovo Mirage
Yes
Yes
Yes
Yes
Required
Canon EOS R5 Mark II CRM
Yes
Yes
Yes
Yes
Required
Canon EOS R5 C CRM (8K59.94)
Yes
Yes
Yes
Yes
Required
CALF Gen 1
Yes
Yes
Yes
Yes
Required
Photo profile coverage
Photo route
Preview/export
Calibration behavior
GoPro MAX2 .36P
JPG export and Timeline
Uses same-serial video calibration when present; otherwise opens with transient photo alignment after a warning.
DJI Osmo 360 JPG
JPG export and Timeline
Uses a transient single-frame photo correction; no video calibration or serial chooser is needed.
Insta360 X5/X6 INSP/DNG
JPG, DNG from DNG sources, and Timeline
Requires matching same-camera-serial video calibration. X6 uses its own lens geometry.
Kandao Q3U JPG/DNG
JPG, eligible DNG, and Timeline
Requires a compatible Q3U video calibration; a chooser may be offered.
Lenovo Mirage JPG
JPG export and Timeline
Requires matching same-serial video calibration.
Canon EOS R5 Mark II JPG/CR3
JPG, processed DNG from CR3, and Timeline
Uses a transient single-frame photo correction; it does not require or create persistent video calibration.
Canon CRM first-use workflow
1
Open the original CRM
Studio opens a neutral native GPU preview before full visual motion analysis, so you can inspect and calibrate the source immediately.
2
Check the integrated RAW look
Studio develops Canon RAW with its built-in recipe and packaged color resources. No separate EOS VR Utility installation is needed.
3
Calibrate video geometry
Complete Auto-Calibration for the matching R5 Mark II or R5 C video profile before final preview, export, Timeline, or streaming.
4
Enable stabilization when needed
Studio generates and caches the visual trajectory on demand. R5 Mark II combines optical motion with its camera metadata; R5 C uses its separate optical-only trajectory.
5
Monitor audio
CRM exposes four 48 kHz, 24-bit mono channels. Monitoring defaults to channels 1 and 2.
Companion-file rules
DJI multipart
Keep all sibling OSV members. Studio validates identity, order, stream compatibility, duration, and logical revision as one inseparable recording.
Insta360 split media
Keep matching _00_ and _10_ parts together. Missing or mismatched parts fail before rendering.
Timeline references
Do not move or replace source media after queuing. A changed logical source is rejected instead of silently rendering different content.
GoPro chaptered video
Keep every GS<FF><NNNN>.360 member together, beginning with GS01. Multi-member GS02+ playback remains fail-closed until genuine chaptered camera footage completes end-to-end validation.
Customer editions
A camera can be valid but absent from a particular build. Install the edition made for that camera family.
04
Everything you need, without a maze of panels
Workspace and import
The left column is your loaded-media shelf, the center is the native GPU preview, the bottom is transport and range control, and the right rail opens processing, information, Timeline, and queue views.
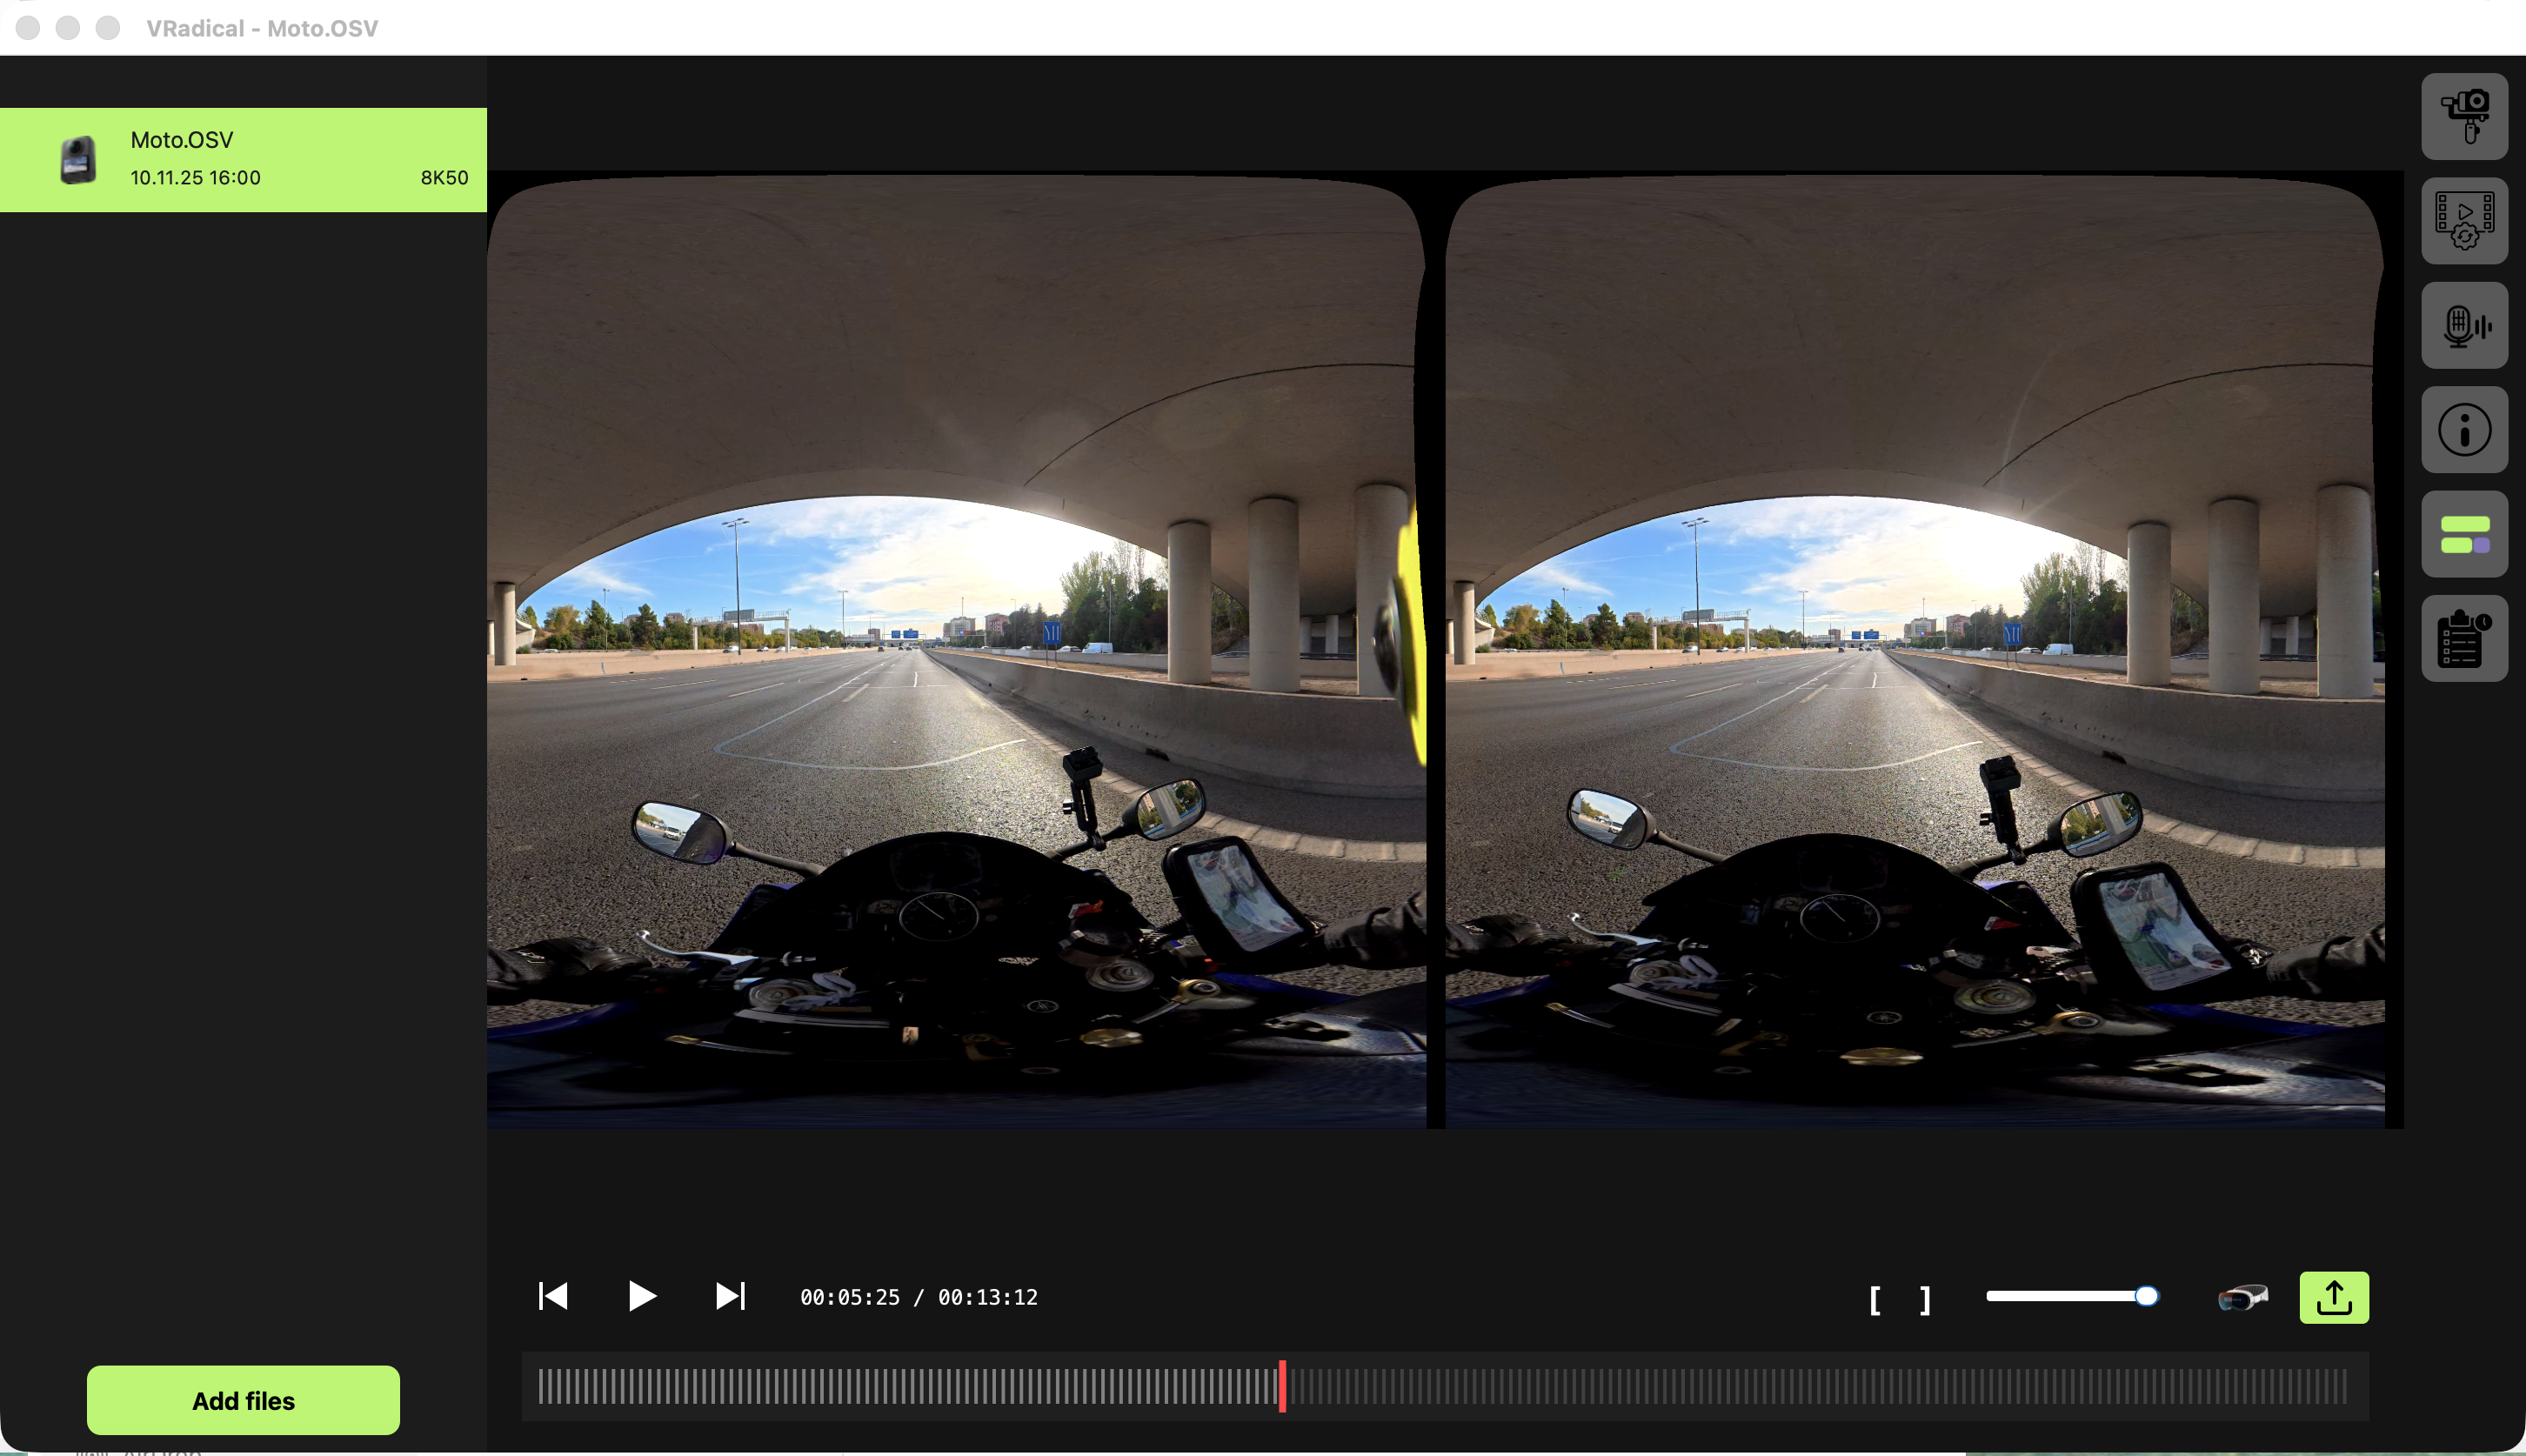
SCREENThe standard video workspace with a calibrated DJI Osmo 360 ride loaded at 8K50.
Import one or many files
1
Choose media
Use File > Open the files, the Open Files/Add files button, or drag supported files into the window.
2
Wait for the batch
Studio probes and validates the entire selection before it exposes the first active clip.
3
Read the summary
If some files are rejected, one summary lists every rejected name and reason. Accepted media arrives together.
4
Handle calibration
If the active import needs calibration, that flow starts only after loading and the rejection summary are finished.
Per-media session state
Every loaded medium keeps its own color, LUT and strength, anti-flicker, image correction, audio mode, and stabilization choices for the current session.
Switching media restores that medium's state; it never inherits the settings of the clip that was just visible.
Restored grade values remain exact, but the named color-profile selector returns to (None) because the session snapshot stores values rather than a live preset association.
Removing a medium forgets its session state. Remove All clears the whole session, and restarting Studio does not restore these creative settings.
Aliases of the same logical multipart recording share one state because Studio treats them as one inseparable medium.
A Timeline clip starts from the source medium's current snapshot, then becomes independently editable inside the project.
Transport controls
Control
Action
Previous Frame
Move back one source frame.
Play / Pause
Start or pause without intentionally dropping late source frames.
Next Frame
Move forward one source frame.
Timecode
Shows current time and clip/range duration.
[ In
Set the export/stream start at the current frame.
] Out
Set the export/stream end at the current frame.
Volume
Adjust monitoring volume. It does not replace the chosen audio-processing mode.
Stream
Open DeoVR streaming settings for a video or Timeline.
Export
Open Video Export Settings or Photo Export Settings for the active media.
Playback details that matter
Fractional rates such as 29.97 and 59.94 use a high-resolution schedule rather than an integer-millisecond timer.
When processing is late, Studio displays frames as soon as possible instead of skipping source frames to catch up.
At end of playback, the last rendered frame stays visible. Press Play to restart from the active range.
The preview remains centered when the window is resized.
Photos intentionally hide playback, audio, stabilization, streaming, and In/Out controls.
05
Perfect parallax is a saved camera asset
Calibration
Stereo calibration corrects the final relationship between both output eyes. Studio stores it by camera/profile and automatically reapplies it on future loads. When a profile requires calibration, missing or invalid data blocks final preview, export, streaming, and Timeline output.
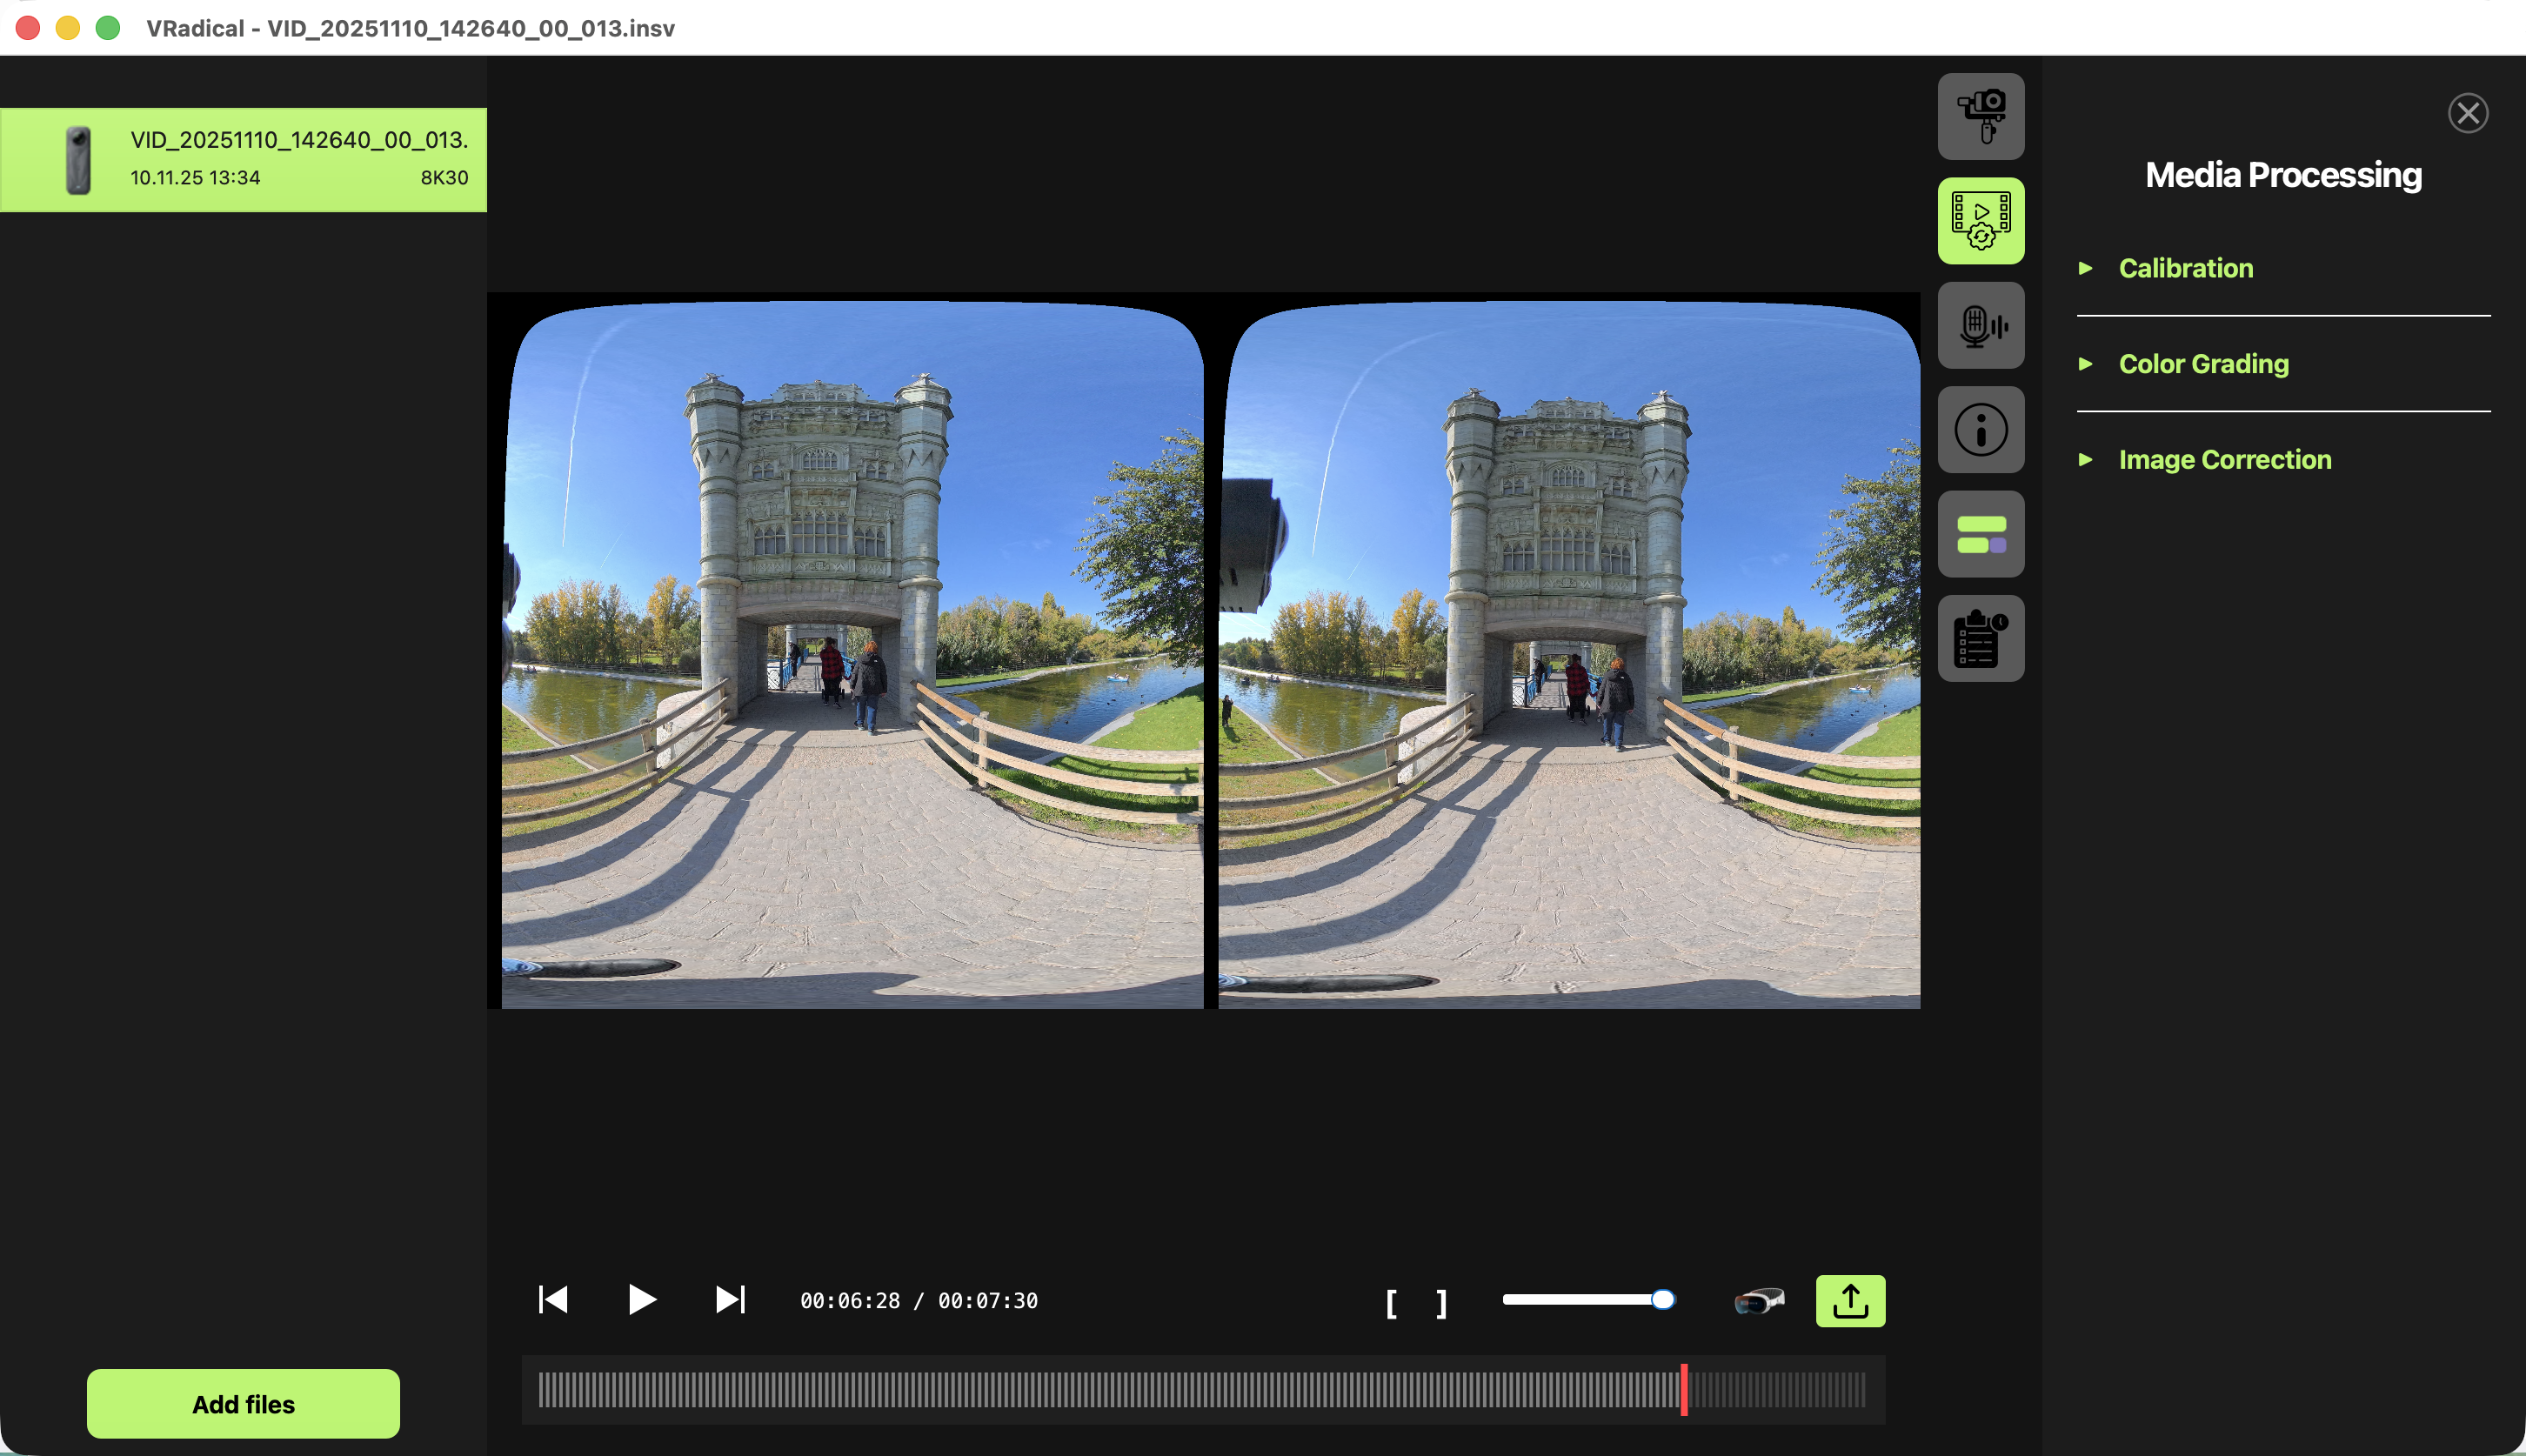
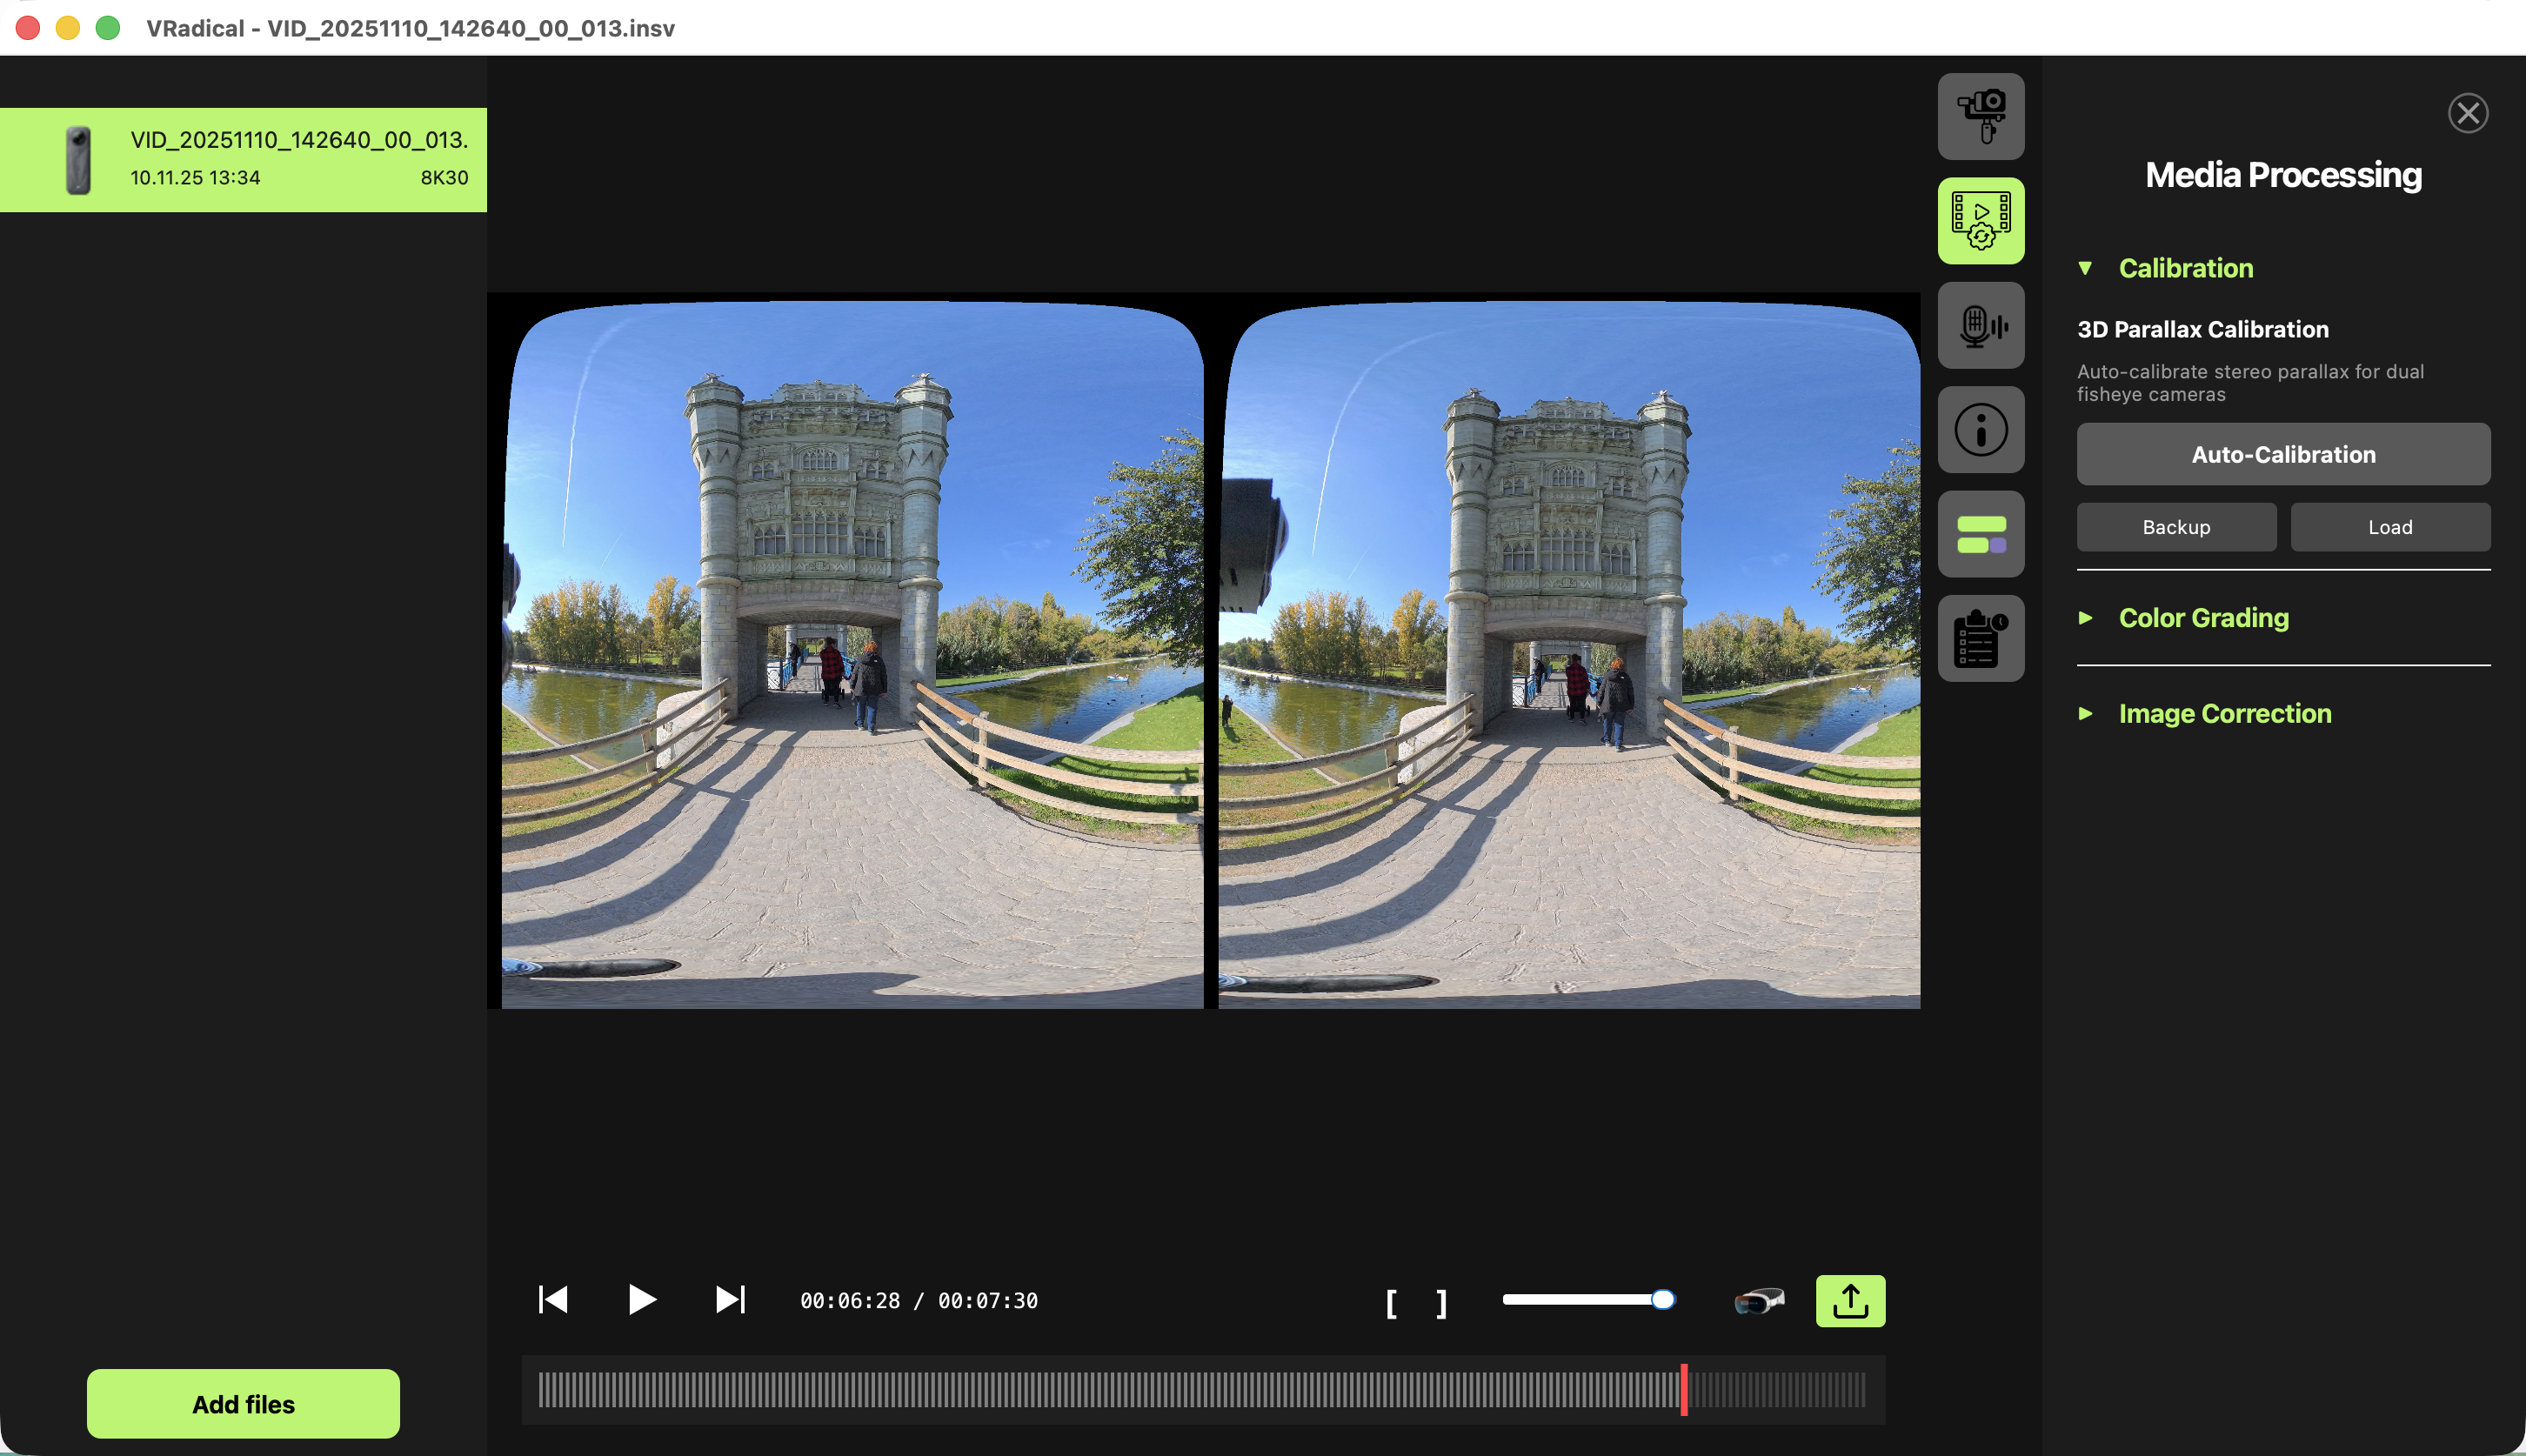
SCREENMedia Processing groups calibration, color grading, and image correction in one focused panel.SCREENThe 3D Parallax Calibration controls: Auto-Calibration, Backup, and Load.
Automatic calibration workflow
1
Load a calibration-capable video
Use a clear, textured scene with useful detail across both eyes and several moments through the clip.
2
Open Media Processing
Expand Calibration and choose Auto-Calibration. Confirm replacement if a usable calibration already exists.
3
Let Studio extract samples
The native GPU renders several final-output eye pairs. Do not move, rename, or disconnect the source during the run.
4
Let the solver finish
Studio prepares stereo matches, rejects weak samples, solves shared rectification and output translation, and validates the result.
5
Load automatically
The resulting camera/profile INI is saved and applied immediately. The same profile loads automatically next time.
Modified DJI sensor orientation
On first setup, Studio may determine cardinal sensor orientation before parallax calibration.
Automatic setup measures stabilization ON and OFF states, then saves one complete Mod profile.
If the scene is ambiguous, Studio does not guess. Use the calibration-purpose manual preview to capture both states, then retry calibration.
An existing Mod profile is authoritative, including an all-zero profile created elsewhere.
Photo calibration identity
Situation
What Studio does
Photo serial matches calibrated video
Loads the same-serial video calibration automatically.
Q3U photo serial differs
Shows a chooser containing compatible, usable Q3U video calibration serials.
Osmo 360 JPG or R5 Mark II JPG/CR3
Runs a transient single-frame correction; no persistent video-calibration INI is required.
A route requiring video calibration has none
Asks you to load and calibrate a compatible video before opening the photo.
Q3U chooser is cancelled
Rejects the photo because the required calibration identity was not selected.
Alias target was removed
Cleans the broken alias and offers the chooser again on the next preflight.
Calibration troubleshooting
Symptom
Best next move
Missing
Run Auto-Calibration with the matching camera video.
Invalid
Verify the camera/profile identity, then create a fresh solve. Do not reuse an unrelated INI.
Low-feature failure
Choose a scene with more texture, less motion blur, and clear overlap across both eyes.
Manual DJI setup requested
Capture both stabilization states. A one-state draft is intentionally not saved as authoritative.
Photo has no calibration
Load a compatible video first, calibrate it, then reopen the photo.
Canon CRM has no calibration
Run Auto-Calibration from the matching R5 Mark II or R5 C CRM; neutral preview may open first, but final video routes require calibration.
06
Choose how the viewer experiences the motion
Stabilization
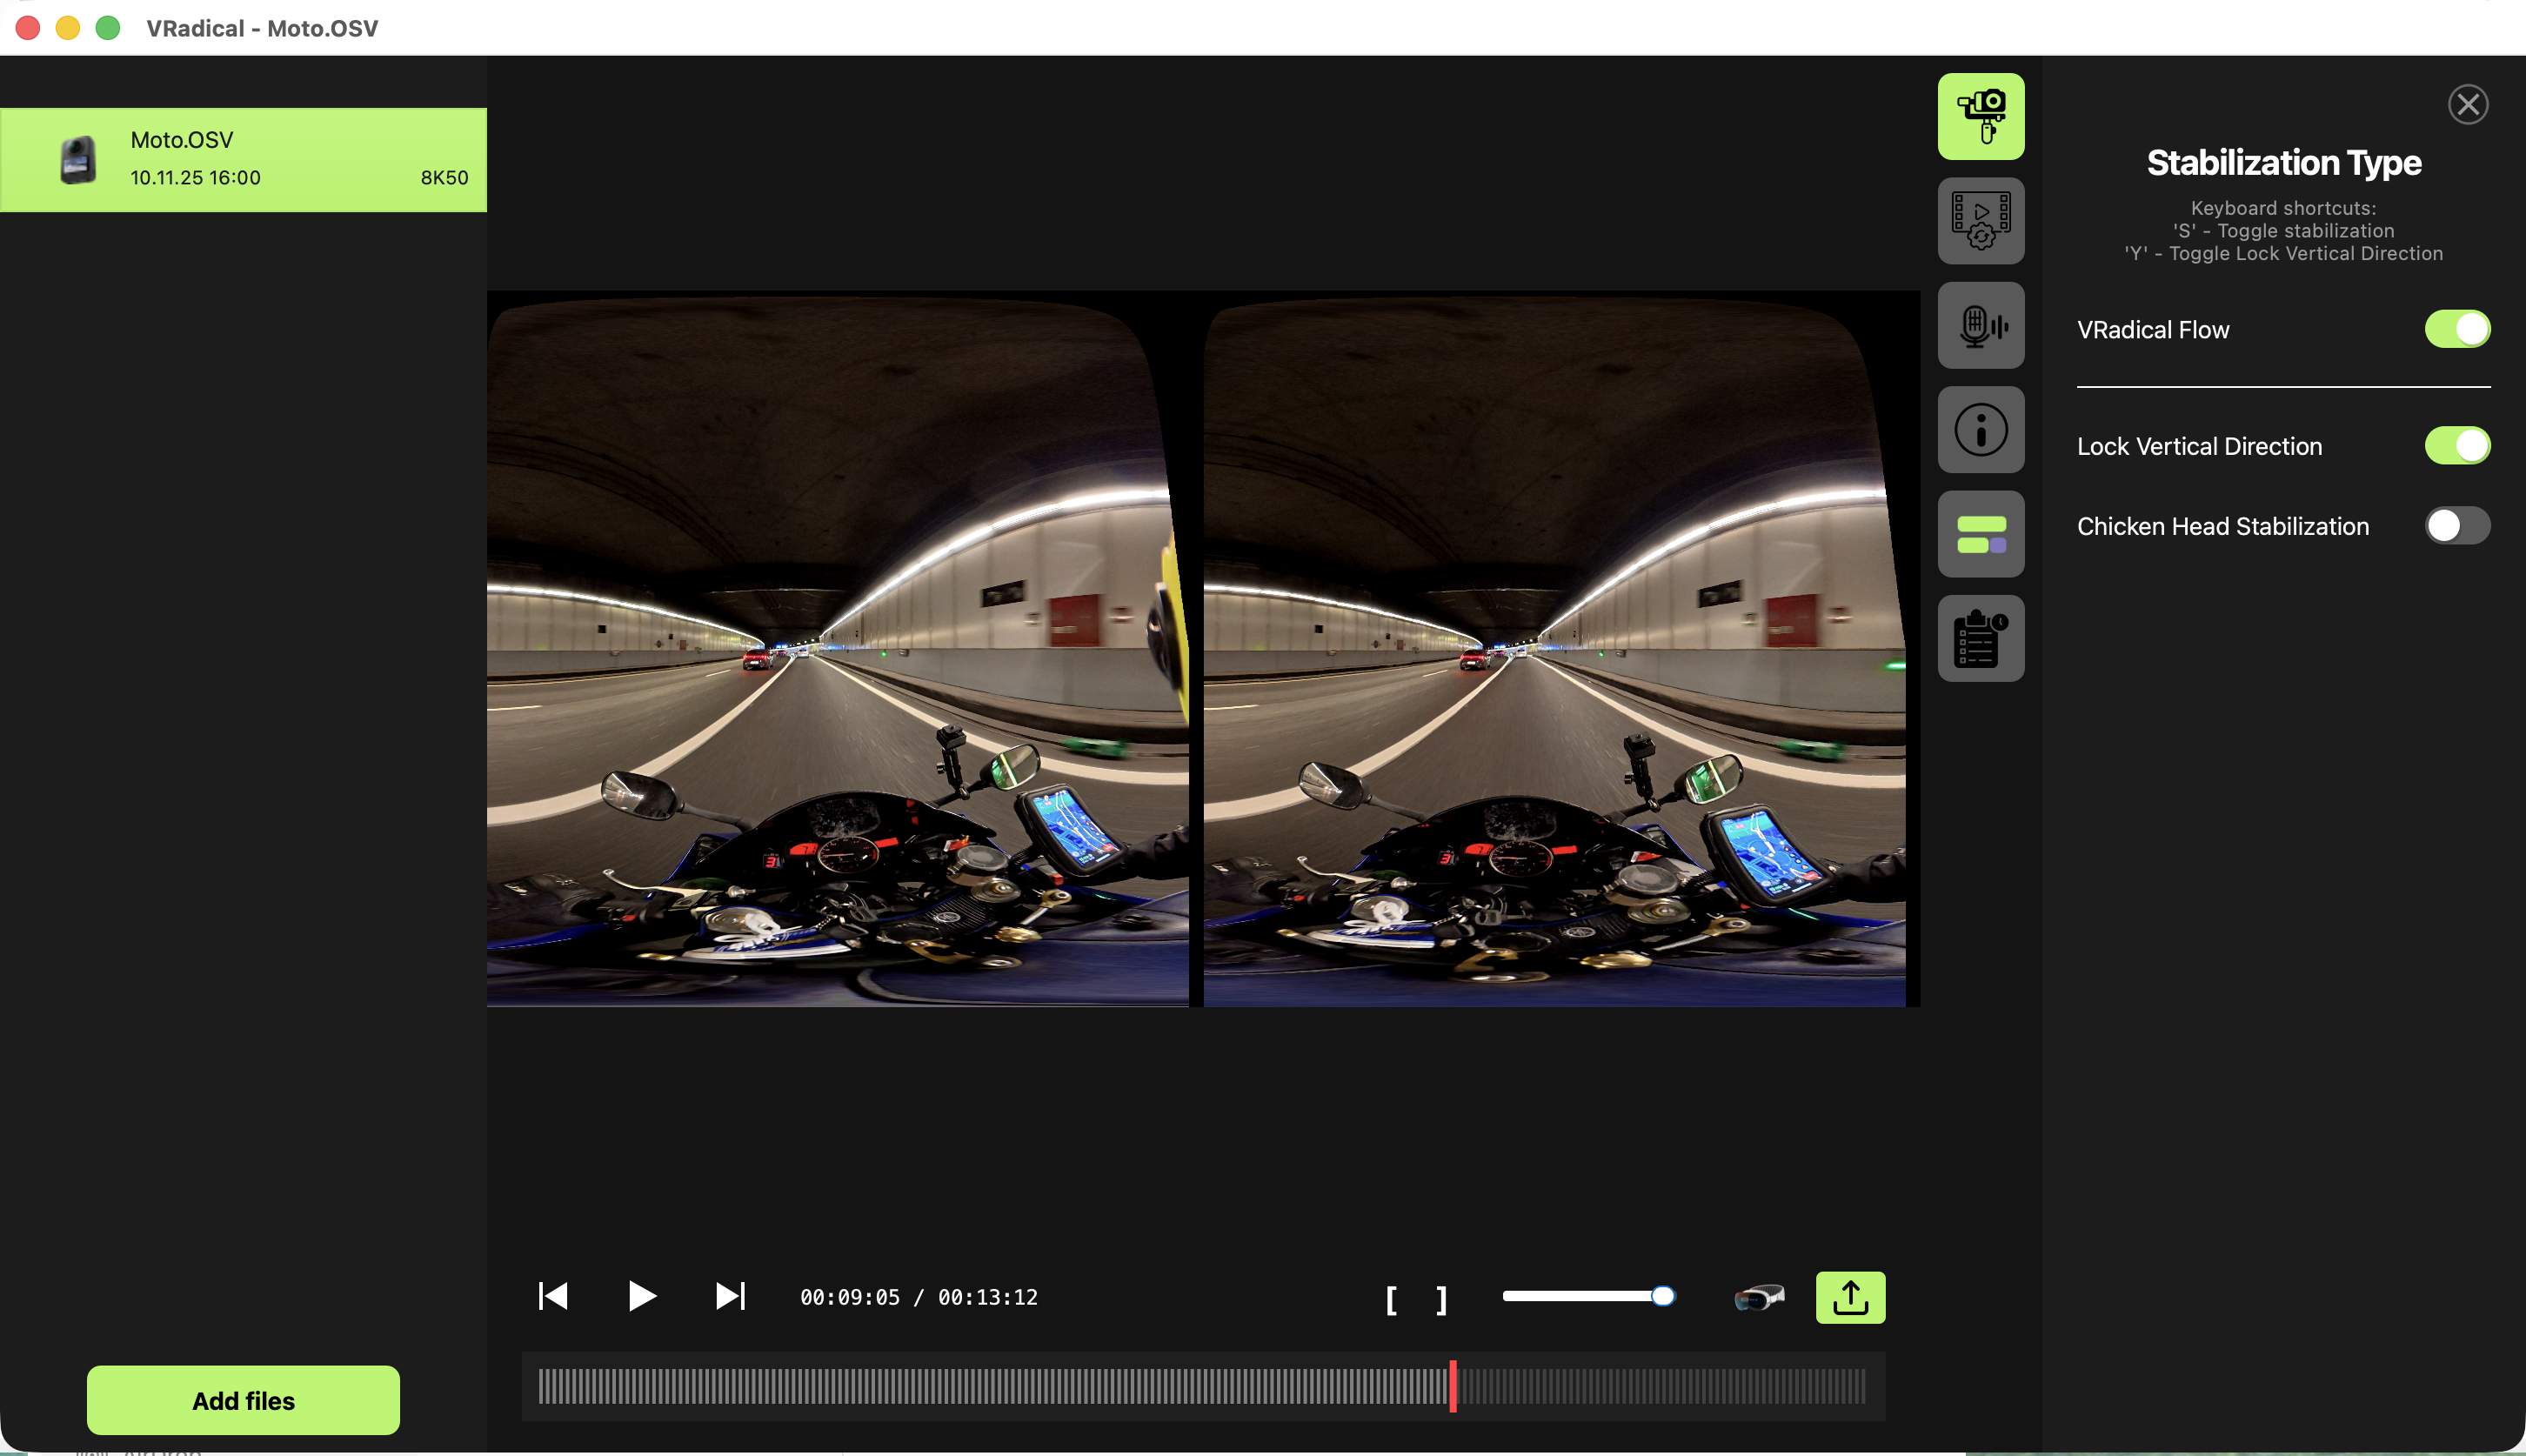
Stabilization controls are camera-policy aware. Studio only shows controls that make sense for the active profile, while preview, export, streaming, and Timeline use the same prepared motion contract. VRadical Flow is the master switch; vertical lock and Chicken Head are optional modifiers.
SCREENDJI Osmo 360 in motion: VRadical Flow and Lock Vertical Direction are enabled while Chicken Head remains off.
Control
Use it when
Viewer experience
VRadical Flow
Most handheld or moving-camera footage.
Master ON/OFF control that smooths global motion while retaining intentional movement.
Lock Vertical Direction
You want a steady horizon/vertical reference.
Flow modifier that holds the horizon/pitch reference. It is not a yaw lock.
Chicken Head Stabilization
You want yaw held to the clip's initial heading.
Flow modifier that holds initial yaw. Enabling it also enables Lock Vertical Direction in the main, export, and streaming dialogs.
A reliable setup order
1
Turn on VRadical Flow
Start with the camera policy defaults and play a representative moving section.
2
Decide on vertical lock
Enable Lock Vertical Direction if horizon stability matters more than retaining the camera's pitch motion.
3
Try Chicken Head only when intentional
Use it for a fixed-forward experience, not as a generic extra smoothing switch.
4
Check source limits
Large framing corrections or extreme motion can expose honest black borders where no source pixels exist.
5
Preview the export range
Scrub the first, fastest, and last motion in the marked range before export.
Older GoPro BERS0/EAC profiles can expose Gyroscope and camera-specific rolling-shutter factor controls.
DJI Osmo 360 and Osmo 360 II use their own camera metadata and rolling-shutter policy, with separate calibration identities and one rigid motion basis for both eyes.
Insta360 EVO, X4, X5, X6, One R/RS, and 1-inch profiles use dense FlowState motion, automatic metadata rolling shutter, and one shared trajectory for both eyes. Residual rolling-shutter sliders stay hidden.
On X4/X5 clips recorded with both sensors down, Studio can retry left +90/right -90 automatically when no authoritative Mod profile exists, then save the working orientation. X6 keeps its own source layout policy.
Kandao Q3U video automatically uses the FlowState path shared with Insta360 X4/X5/X6 when moving, and its steadier static path when the whole recording is detected at rest. Rolling-shutter correction is automatic with complete metadata. It supports the 24, 25, and 30 fps families within a 0.5 fps tolerance. Inspect tripod shots from start to end for residual drift.
Canon CRM offers Off, VRadical/EOS VR Utility Flow, Lock Vertical Direction, and Chicken Head. R5 Mark II uses optical motion with its CTMD inertial data and applies exact rolling-shutter correction only when per-clip evidence proves it. R5 C has a distinct optical-only trajectory without IMU or row correction. Gyro-fusion and residual rolling-shutter controls remain hidden.
Photos are static sources and do not expose stabilization controls.
07
Make it feel finished
Look, geometry, and audio
Media Processing is where the technical image becomes your image. Color and LUT work is camera-neutral, image correction changes framing and eye geometry, and audio modes flow into preview, Timeline, and export.
Color grading controls
Control
Practical use
LUT
Choose a built-in camera-aware look or import a 3D .cube file. The LUT runs first in display-referred BT.709 signal space.
Intensity
Blend the LUT from 0 to 100 percent before color sliders.
Temperature / Tint
-100 to +100. Bradford white balance runs in linear light; positive Tint moves toward magenta.
Saturation
-100 to +100. Scales chroma while preserving luminance.
Exposure
-5.0 to +5.0 EV in 0.1 steps. A +1 EV move doubles linear-light exposure.
Contrast
-100 to +100. A luminance-only S-curve preserves in-gamut chromaticity.
Highlights / Midtones / Shadows
-100 to +100. Post-exposure tonal masks change luminance only in the selected zone.
Whites / Blacks
-100 to +100. Set the bright and dark endpoints without per-channel clipping.
Anti-Flickering
Use on video when exposure or lighting flicker is visible. It is not available for photo export.
Automatic camera looks and the LOG badge
Studio reads camera-written color metadata. A LOG badge on the media row and the exact recording format in File Properties tell you when a recognized LOG or flat recording mode is present.
The Automatic LUT default chooses a validated camera transform when available: for example MAX2 GP-Log, Osmo 360 or 360 II D-Log M, Q3U K-Log, X5 Flat, and X6 I-Log use their matching packaged looks.
Recognized footage without a validated transform stays neutral; Studio does not invent a LUT. A manual LUT choice, including None, overrides Automatic for that clip and its output.
The same automatic or overridden look reaches preview, export, Timeline, and DeoVR streaming.
Live RGB histogram
1
Enable the scope
In Color Grading, select RGB histogram below Reset. The complete final left eye stays visible; the right preview half becomes one graph.
2
Choose curves
Red, Green, Blue, and Luminance start selected. Turn off unneeded curves while leaving at least one selected.
3
Compare edits
The graph measures the final graded left eye, including the LUT and visible black borders. Its vertical scale is fixed from the first complete frame so later grade changes remain comparable.
4
Use Log scale if useful
Log scale changes only graph height, not image processing or the real pixel-count labels. Toggle the scope off and on to establish a new scale.
Import and save a LUT workflow
1
Open Color Grading
Expand the section and choose New beside LUT.
2
Select a .cube file
Studio copies the LUT into your personal VRadical LUT folder so it remains available.
3
Set intensity
Start around 30 to 60 percent, then tune exposure and tonal sliders. A manual choice overrides the camera's Automatic look.
4
Save a profile
Use Save to name the complete grade for reuse.
5
Reset safely
Reset returns the active clip's grade to neutral without deleting saved profiles or LUT files.
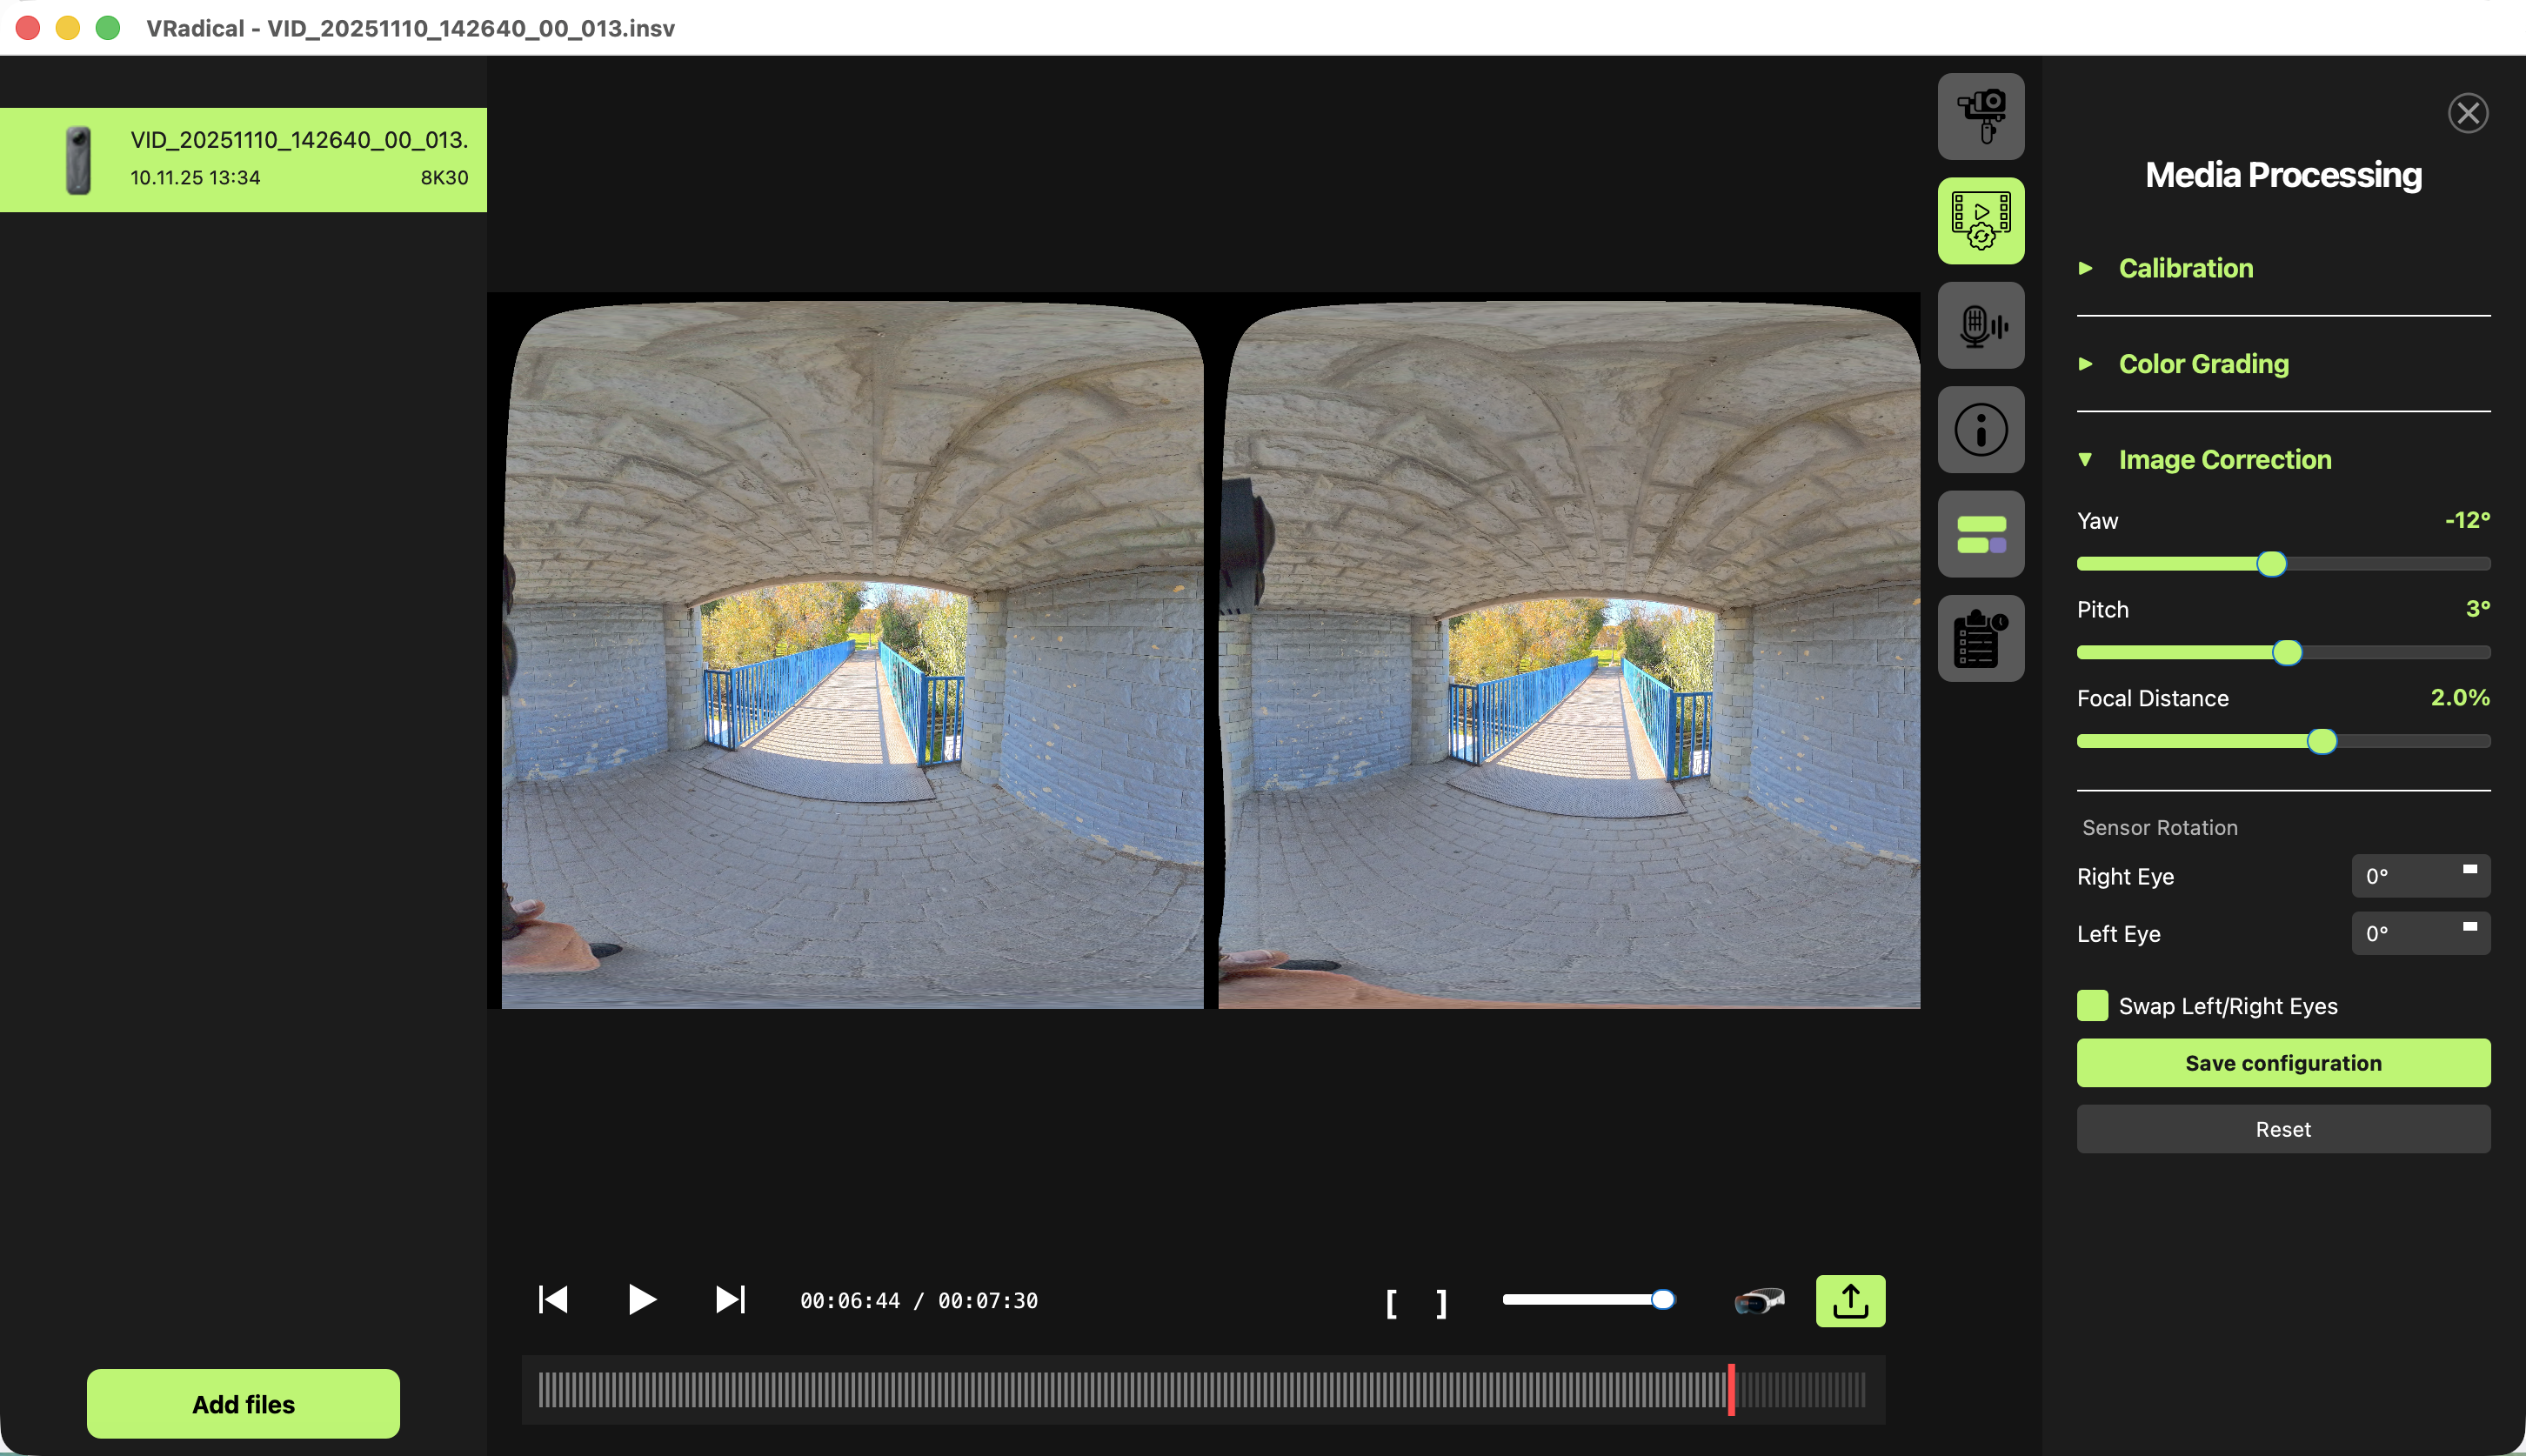
SCREENImage Correction for framing, sensor orientation, eye order, and per-camera Mod profile saving.
Image correction controls
Control
Range / behavior
Yaw
-180 to +180 degrees. Reframes horizontally in the camera-appropriate projection stage.
Pitch
-180 to +180 degrees. Reframes vertically; source limits can reveal black regions.
Focal Distance
-10 to +10. Adjusts framing scale without pretending missing source pixels exist.
Faded edges
GoPro routes only when applicable. Softens eligible outer source edges; width is camera-policy controlled.
Left / Right sensor rotation
Cardinal values -90, 0, 90, or 180 degrees for final output eyes.
Swap Left/Right Eyes
Changes the final SBS eye order before calibration is applied.
Save configuration
Writes the active camera's persistent Mod profile.
Reset
Restores the active clip's image correction defaults.
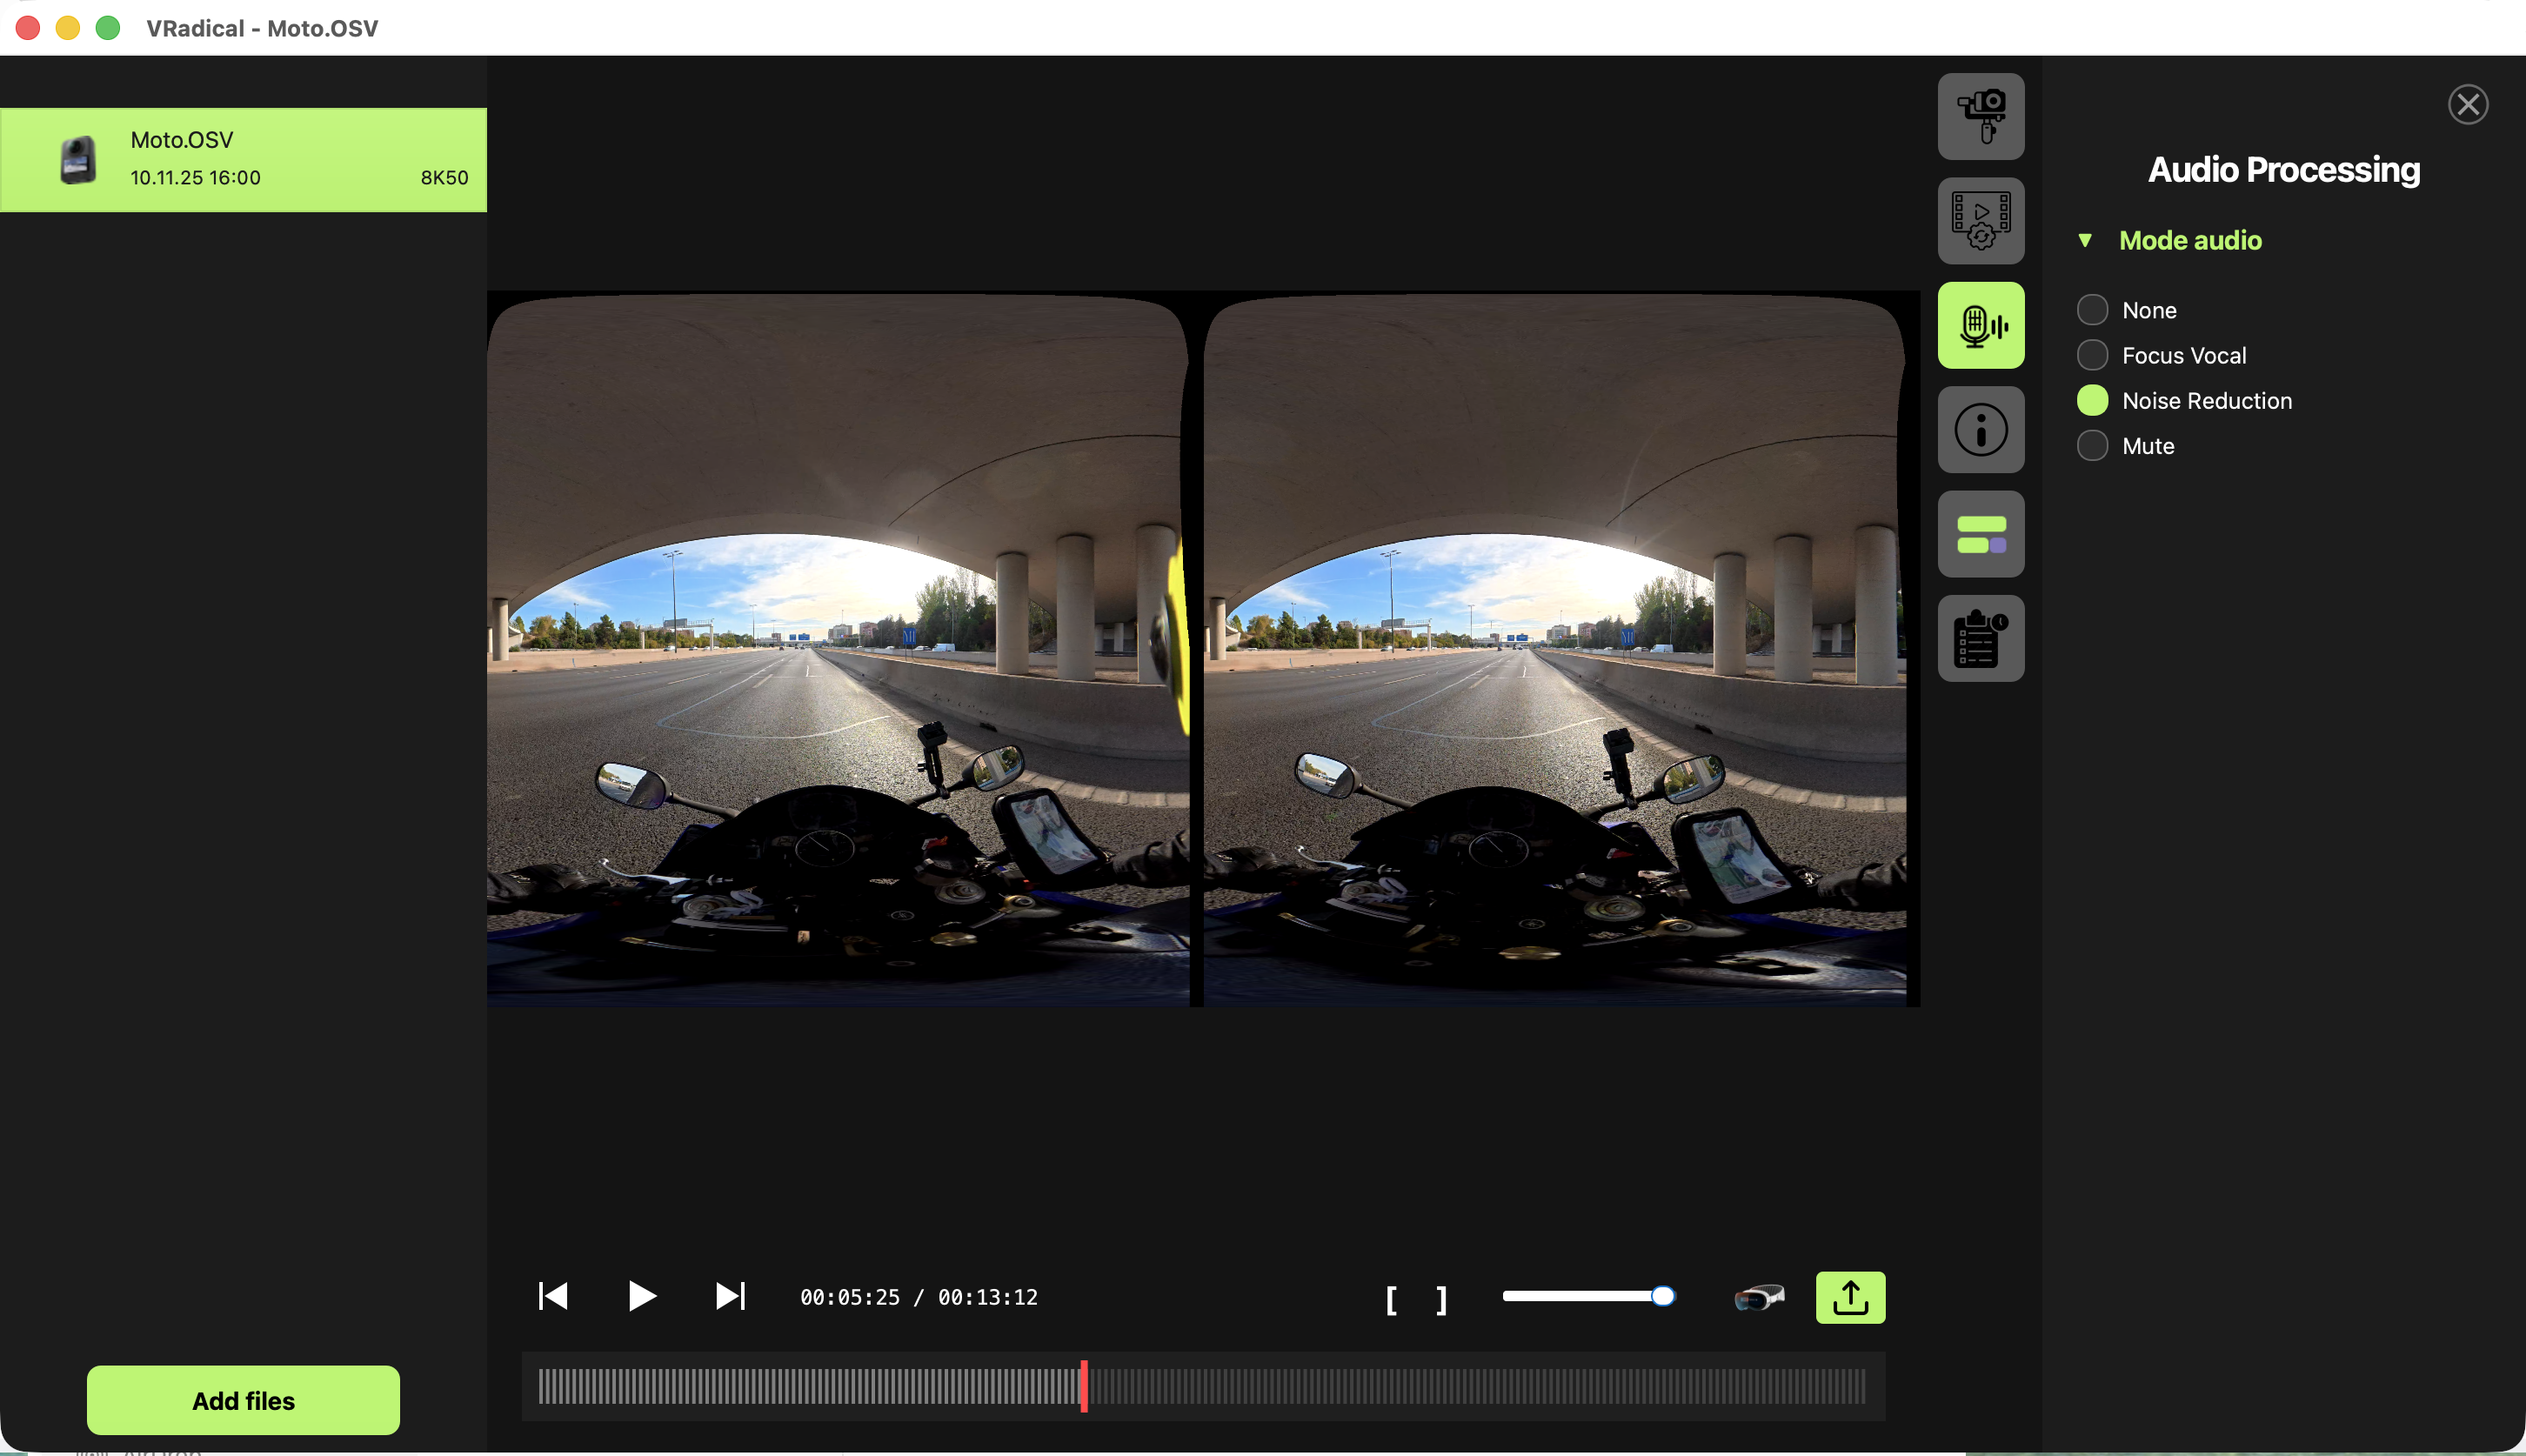
SCREENAudio Processing modes are simple on purpose and carry consistently into the delivery path.
Audio modes
Mode
Result
None
Leaves sample processing bypassed.
Focus Vocal
Prioritizes speech and reduces competing ambience when the audio DSP is available.
Noise Reduction
Reduces steady background noise while preserving a more general mix.
Mute
Outputs silence for the clip. This remains available even if advanced audio DSP is absent.
08
Full-resolution delivery, responsive GPU preview
Photo workflows
A photo is not treated as a one-frame video. Studio decodes it once, caches the active native GPU source, shows a bounded interactive preview, and keeps the requested or full resolution for export.
Open and finish a photo
1
Import the original
Open a supported .36p, .jpg, .cr3, .insp, or .dng whose camera family is enabled. Canon .jpeg is not an accepted alias.
2
Resolve geometry
Use matching video calibration when the photo route requires it; Q3U can offer a compatible video-serial chooser. Original Osmo 360 and R5 Mark II photos use transient single-frame correction.
3
Inspect both eyes
Check vertical alignment, scale, seams, and common visibility at the center and borders.
4
Frame the shot
Use Color Grading and supported image-correction controls. Photos do not expose audio or stabilization.
5
Export
Choose JPG final SBS/VR180, or DNG only when the source route and output contract support it.
Camera-specific photo behavior
Camera
What to expect
GoPro MAX2 .36P
A baked ERP photo with camera-specific yaw/split alignment and optional same-serial persistent video calibration.
DJI Osmo 360 JPG
Stitched ERP seam recovery and transient single-frame stereo correction; no video calibration or serial chooser is needed. Osmo 360 II has no distinct registered photo route.
Insta360 X5/X6
Native INSP/DNG photo route with matching same-camera-serial video calibration. X6 keeps its own upright SBS lens layout.
Kandao Q3U
Dual-fisheye JPG/DNG route with static gravity redress, shared lens orientation policy, and compatible video calibration.
Lenovo Mirage
Extended-XMP photo route with matching same-serial video calibration.
Canon EOS R5 Mark II
Exact 8192x5464 JPG/CR3 route for the RF 5.2mm lens. JPG can export JPG; CR3 can export JPG or a processed DNG. R5 C photos are not supported.
Photos in a Timeline
A photo becomes a silent static visual clip with a default duration of 2 seconds.
Trim or stretch the block to change how long the same rendered frame remains on screen.
Photo clips support placement, transitions, color/LUT, and image correction.
Photo clips never expose audio or stabilization controls.
Timeline export renders the calibrated native still at the Timeline cadence for the block's duration.
09
One dialog, a lot of delivery power
Video export
Video export snapshots the active media state, validates the camera route and calibration, then queues a job that uses the same native GPU processing contract as preview. For H.264, HEVC, and AV1 hardware requests on Windows, Studio reports an encoder failure instead of silently switching to software.
Export a clip
1
Set In and Out
Mark the range in the player, or leave the full clip active.
2
Open Export
Choose the green export button at the lower right.
3
Name the file
Choose a destination and a meaningful filename. Studio adds a numeric suffix when the name already exists.
4
Choose the picture
Set resolution, one of the supported VR or flat projections, frame rate, codec, bit depth, denoise, and sharpening.
5
Confirm motion and metadata
Review stabilization, hardware acceleration, and VR metadata.
6
Start Export
The validated job enters the Export Queue. You can keep working while it runs.
Core export controls
Setting
Choices and guidance
Bitrate
10 to 300 Mbps normally. Canon CRM RAW, or a Timeline containing it, allows H.264, HEVC, and AV1 requests up to 795 Mbps; the exact hardware encoder may reject rates its GPU or driver cannot support. AV1 Main profile has a separate general limit of 800 Mbps. The 120 Mbps default is unchanged. ProRes and MV-HEVC do not expose a bitrate control.
Resolution
The dialog spans width 640-15360 and height 180-8640; the camera, source-eye resolution, projection ratio, and codec narrow valid combinations.
Projection
Hequirect, Fisheye, Rally, 2D Linear, 2D Wide, 2D Ultra Wide, or 3D Flat when the active camera route permits them.
Frame rate
Source rate or 24, 25, 29.97, 30, 50, 59.94, 60, 90, 100, or 120 fps. A target above the source automatically selects GPU RIFE interpolation.
Encoding
H.264, HEVC, AV1, ProRes Standard, ProRes HQ, plus macOS Vision Pro formats when available.
Color depth
8 or 10 bits when supported by the selected codec and route.
Denoise
The Enable checkbox uses New Style; unchecked is Off. Older saved enabled profiles still submit New Style through this dialog. The CLI separately accepts explicit old mode.
Sharpening
None, Light, Medium, or Strong. Registered Canon CRM video uses its directional RAW-detail model; other sources use adaptive output sharpening. With New Style denoise and native H.264/HEVC/AV1 encoding, the selected model runs once after denoise.
Hardware Acceleration
On by default. On Windows, H.264, HEVC, and AV1 strictly use the encoder attached to the active GPU. If it fails, Studio reports the hardware error; turn this setting off explicitly only when you want software encoding. Image processing remains on the GPU.
VR / 3D metadata
Standard immersive output can include VR metadata. Flat 2D has no VR/stereo metadata; 3D Flat can add conventional side-by-side 3D metadata without marking the picture as spherical.
Choose the output projection
Choice
Picture
Delivery notes
Hequirect
Stereoscopic half-equirectangular VR180, left and right SBS.
The usual immersive master; VR metadata is available.
Fisheye
Stereoscopic fisheye SBS.
Use when the destination expects fisheye instead of a hequirectangular remap.
Rally
Square stereo equirectangular frame with top/bottom eyes.
Selecting Rally fixes Flow, vertical lock, and Chicken Head on.
2D Linear
One rectilinear 16:9 view from the final left eye, 110-degree diagonal field of view.
No VR or stereo metadata.
2D Wide / Ultra Wide
One rectilinear 16:9 view, 125- or 135-degree diagonal field of view.
More coverage with stronger edge stretching; no VR or stereo metadata.
3D Flat
Two Linear 16:9 views side by side in one 32:9 frame.
Optional 3D SBS metadata; never marked spherical.
Raise frame rate with RIFE
1
Choose a higher target
For a 24, 25, or 30 fps source, choose a higher export rate such as 60 fps. The RIFE badge appears in the dialog and queue.
2
Review the range
GPU RIFE creates intermediate frames after camera rendering and New Style denoise, then the result is encoded once. It can require substantial GPU memory and time at high resolution.
3
Keep edits independent
In a mixed Timeline, each source clip is checked independently; interpolation never crosses a cut or gap. Photos hold their image and are not interpolated.
Codec and container guide
Codec
Container
Best for
Notes
H.264
MP4
Broad compatibility
8-bit oriented and less efficient than HEVC at very high VR resolutions.
HEVC
MP4
Modern VR delivery
Strong default for 6K/8K, with 10-bit support when available.
AV1
MP4
Efficient modern delivery
Encoder availability and speed depend on hardware and platform.
ProRes Standard
MOV
Editing masters
Large, robust intermediate for downstream post-production.
ProRes HQ
MOV
High-quality masters
Larger than ProRes Standard.
Spatial Vision Pro
MOV
Apple spatial presentation
macOS-only, 10-bit, and Hequirect.
Immersive Vision Pro
MOV
Apple immersive presentation
macOS-only, 10-bit, and Hequirect.
Built-in YouTube profiles
Profile
Exact built-in settings
Youtube 8K 8bit
8640x4320, 29.97 fps, 200 Mbps, HEVC, 8-bit, Hequirect, hardware acceleration ON, denoise Off, sharpening None, Flow ON, Lock Vertical ON, Chicken Head OFF, VR metadata ON, YouTube ON.
Youtube 8K 10bit
Same settings, with 10-bit color depth.
10
Single shots or a whole mixed delivery
Photo, batch, and queue
Photo export keeps the still-image route honest, while mixed batch export validates every selected medium before anything enters the queue. Each camera family and media kind gets the settings it actually supports.
Photo export settings
Setting
Behavior
File name and path
Choose the output folder and final name. JPG is the normal delivery format.
Format
JPG final SBS/VR180, or DNG only for eligible DNG source routes.
Projection
Hequirect SBS/VR180 or Fisheye SBS when the photo pipeline supports it.
Resolution
Use the full/requested still resolution, independent of the bounded interactive preview.
Denoise / Sharpen
Check Denoise: Enable for New Style or leave it unchecked for Off; choose None, Light, Medium, or Strong sharpening.
VR/photo metadata
Enabled for JPG when you want compatible viewers to identify the result.
Mixed batch export
1
Select several media items
Include supported videos and photos from one or more enabled camera families.
2
Choose Export
Studio groups the selection by camera family and media kind.
3
Review every tab
Each group keeps its original video or photo export controls. A fixed camera policy can override an incompatible tab choice.
4
Choose the destination
Video groups may offer immersive or Flat projections according to every source eye in that group. A higher chosen output rate activates RIFE for eligible video sources.
5
Resolve names
Choose output names and let Studio avoid collisions with unique suffixes.
6
Validate the complete batch
Studio checks every photo/video job before queuing any of them.
7
Enqueue atomically
If validation succeeds, the full batch enters the queue and executes sequentially.
Export Queue
State
Meaning
Pending
Validated and waiting for earlier jobs.
Starting
Preparing the native route, decoder, processing snapshot, and encoder.
Exporting
Rendering with live percentage progress.
Completed
Delivery finished successfully.
Failed
The job stopped with a preserved error message and can be inspected or retried.
Cancelled
The user requested a clean stop.
Queue context actions
Export Settings - review the frozen job settings.
Show in Finder / Explorer - reveal a completed output.
Retry - rebuild a failed or cancelled attempt from its job contract.
Show Error - read the complete failure reason.
Remove from list - clear a finished entry without deleting its output.
Cancel export - request a clean stop for an active job.
Publish after export
Destination
Workflow
DeoVR
Connect an account, prepare title/description and destination options, then upload after export succeeds.
JillVR
Connect and configure the destination. Upload begins only after the local file completes.
YouTube
Choose title, description, category, privacy, schedule, thumbnail, subtitles, language, and applicable video options.
11
Mix cameras without flattening their identity
Timeline
Timeline mode gives you one visual track for supported video and photo clips plus one external audio track. Every visual clip keeps its named camera pipeline, calibration, and per-clip processing settings.
Build a project
1
Load source media
Import every video and photo you plan to use. Referenced media also loads when you open a Timeline project.
2
Enter Timeline
Choose the Timeline button on the right rail.
3
Add visual clips
Double-click or drag supported media into the visual track.
4
Add external audio
Use + Audio for WAV, MP3, M4A, AAC, or FLAC from the file picker.
5
Arrange and trim
Drag clips, adjust edges, split at the playhead, and remove unwanted blocks.
6
Polish each clip
Open clip-specific audio, color, image correction, or stabilization where supported.
7
Save
Write a .vradical-timeline project before export or streaming.
Editing operations
Operation
Behavior
Move
Reposition a selected visual or audio block on its track.
Trim
Drag a block edge to change source In/Out for video or displayed duration for a photo.
Split
Cut the selected video at the playhead with the toolbar or C/B shortcut.
Remove
Delete the selected block without deleting the original media.
Mute
Mute a selected video clip's embedded audio.
Zoom / Fit
Change Timeline scale or fit the project span into view.
Normalize audio
Analyze levels and apply a consistent Timeline listening target.
RGB
Toggle the same final-left-eye RGB/luminance histogram used in Color Grading. The button sits next to audio normalization.
Track volume
Adjust external audio-track level independently.
Transitions
Track
Choices
Video
None, Fade to Black, Fade to White.
Audio
Fade, Crossfade, Keep as is.
Per-clip settings
Video clips can carry their own stabilization mode, audio mode, color/LUT grade, and image correction.
A new clip is initialized from its source medium's current session snapshot; later Timeline edits belong to that clip.
Photo clips carry color/LUT, image correction, placement, trim duration, and transitions, but no audio or stabilization.
Sensor rotations and Mod profiles are materialized per camera serial before a job is assembled.
A Timeline may mix clips from different registered camera profiles on the same visual track.
If a referenced logical multipart source changes, Studio fails closed and asks you to reload instead of rendering new physical members silently.
Save, reopen, export, and stream
Save projects with the .vradical-timeline extension.
Keep project media at stable paths, with companion and multipart files intact.
Opening a project imports referenced photos and videos into the left media list.
Timeline export uses the same camera route per clip and the selected global output cadence/codec.
A global output cadence above a video's own source rate selects RIFE for that clip. The interpolation pair is reset at every edit boundary; photo clips are not interpolated.
Flat 2D and 3D output are available only when every contributing camera route and source-eye size meet the selected projection contract.
Timeline DeoVR streaming uses the same local HLS workflow as a video clip.
Preview the frames around every cut and transition before a long master export.
12
A local headset-ready HLS stream
DeoVR streaming
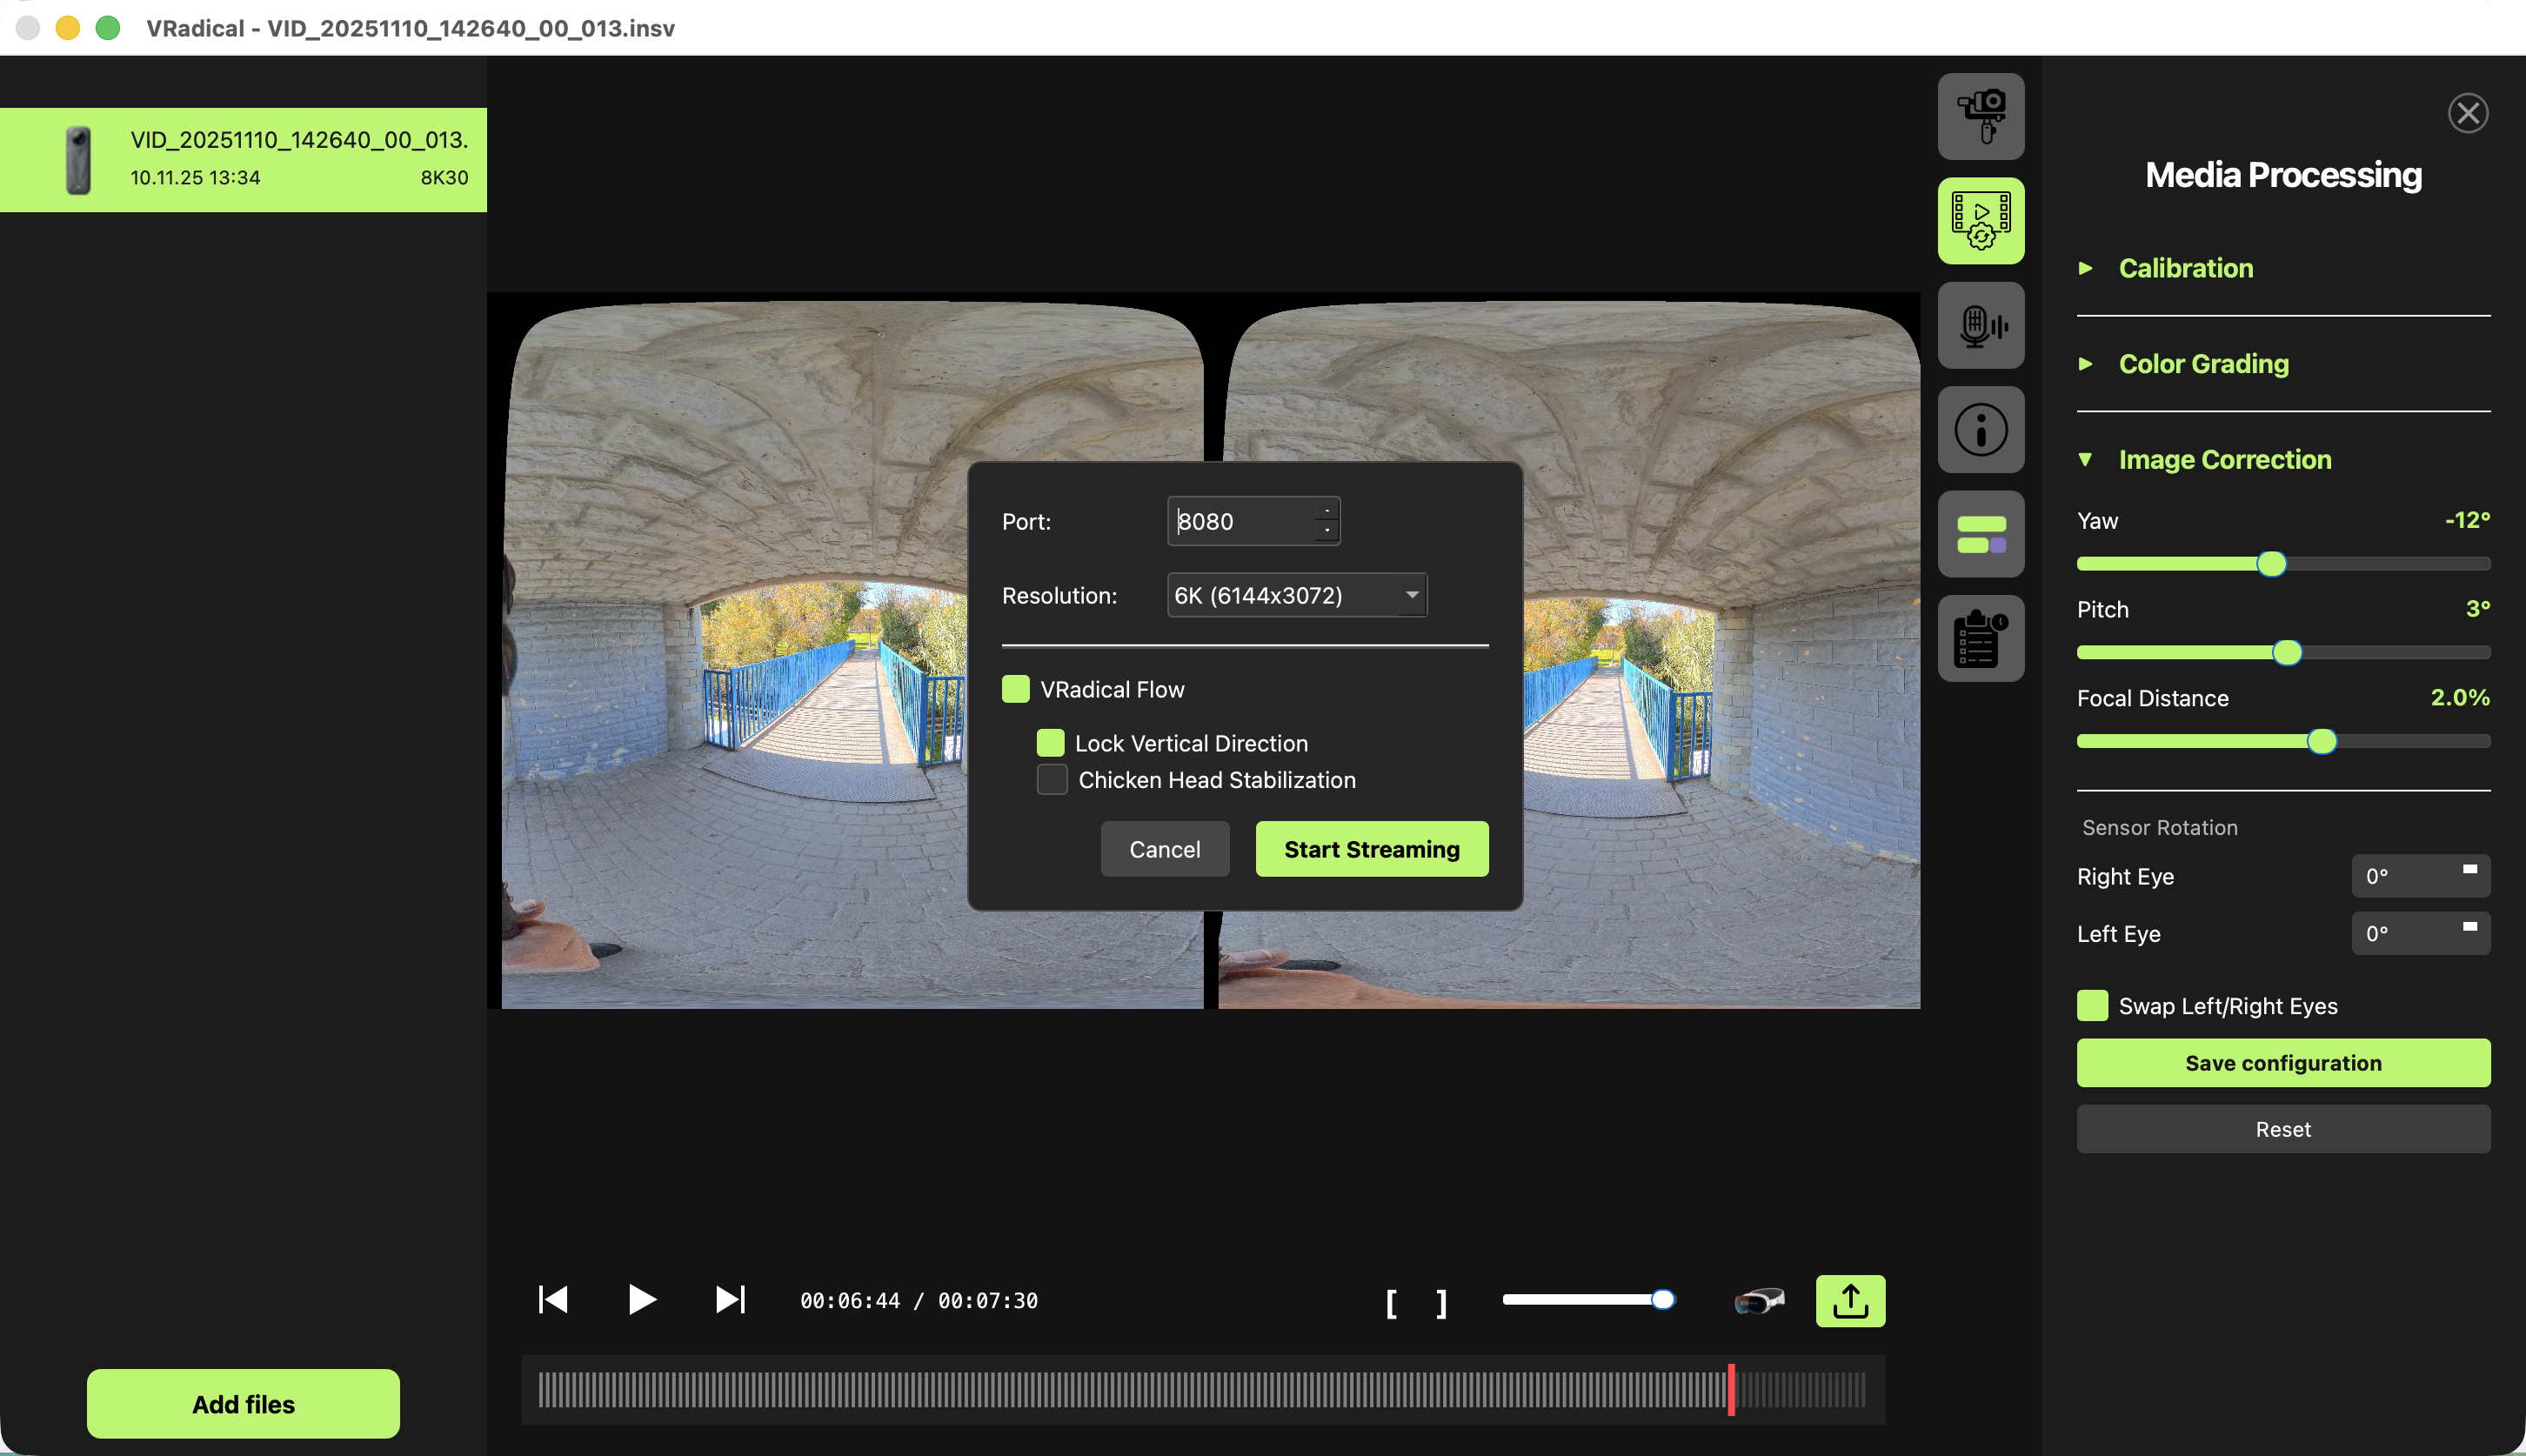
Studio can stream a supported video or Timeline over your local network. It prepares hardware-encoded HEVC HLS, publishes a DeoVR entry point, and keeps temporary segments managed for the life of the session.
SCREENDeoVR setup on port 8080 with 6K output, VRadical Flow, and Lock Vertical Direction.
Start a stream
1
Load a video or Timeline
Photos cannot be streamed.
2
Set the range
Optional In and Out points define the streamed section.
3
Open Stream to DeoVR
Choose the headset button in the lower-right transport area.
4
Choose port and resolution
Port 8080 and 4K are the defaults. Available sizes are 4K, 5.7K, 6K, and 8K. Resolutions above 4K require a very powerful GPU.
5
Review stabilization
Use the same motion choices you previewed for the clip.
6
Start Streaming
Wait through Buffering until Studio reports Streaming and displays the URL.
7
Open DeoVR
On a reachable device, open http://<computer-ip>:<port>/deovr.
8
Stop when finished
Choose Stop Streaming so the server closes and temporary segments are removed.
Video format
HEVC HLS with hardware encoding and 2-second segments.
Ready threshold
Studio normally waits for three playable segments before publishing the stream.
Playlist
The media playlist is available at /stream.m3u8 behind the DeoVR entry point.
Temporary data
Managed in the system temporary folder under vradical_hls and cleaned before, after, and on failure.
Streaming fixes
Problem
Fix
Port already in use
Choose another port between 1024 and 65535.
Headset cannot connect
Confirm both devices share a reachable private network and allow the chosen port through the firewall.
Buffering never becomes Streaming
Check hardware encoder availability, free disk space for temporary segments, and the active export range.
URL uses the wrong interface
Use the computer's reachable LAN address with the chosen port and /deovr path.
Photo selected
Load a supported video or Timeline. Static photos do not expose streaming.
13
Keep recurring setup out of the way
Settings, updates, and profiles
The shared frameless Settings window exposes version information, language selection, trajectory-cache maintenance, authenticated updates in customer builds, and the per-camera Mod profile editor. Use profiles for physical rig setup, not as a substitute for a clip's creative grade.
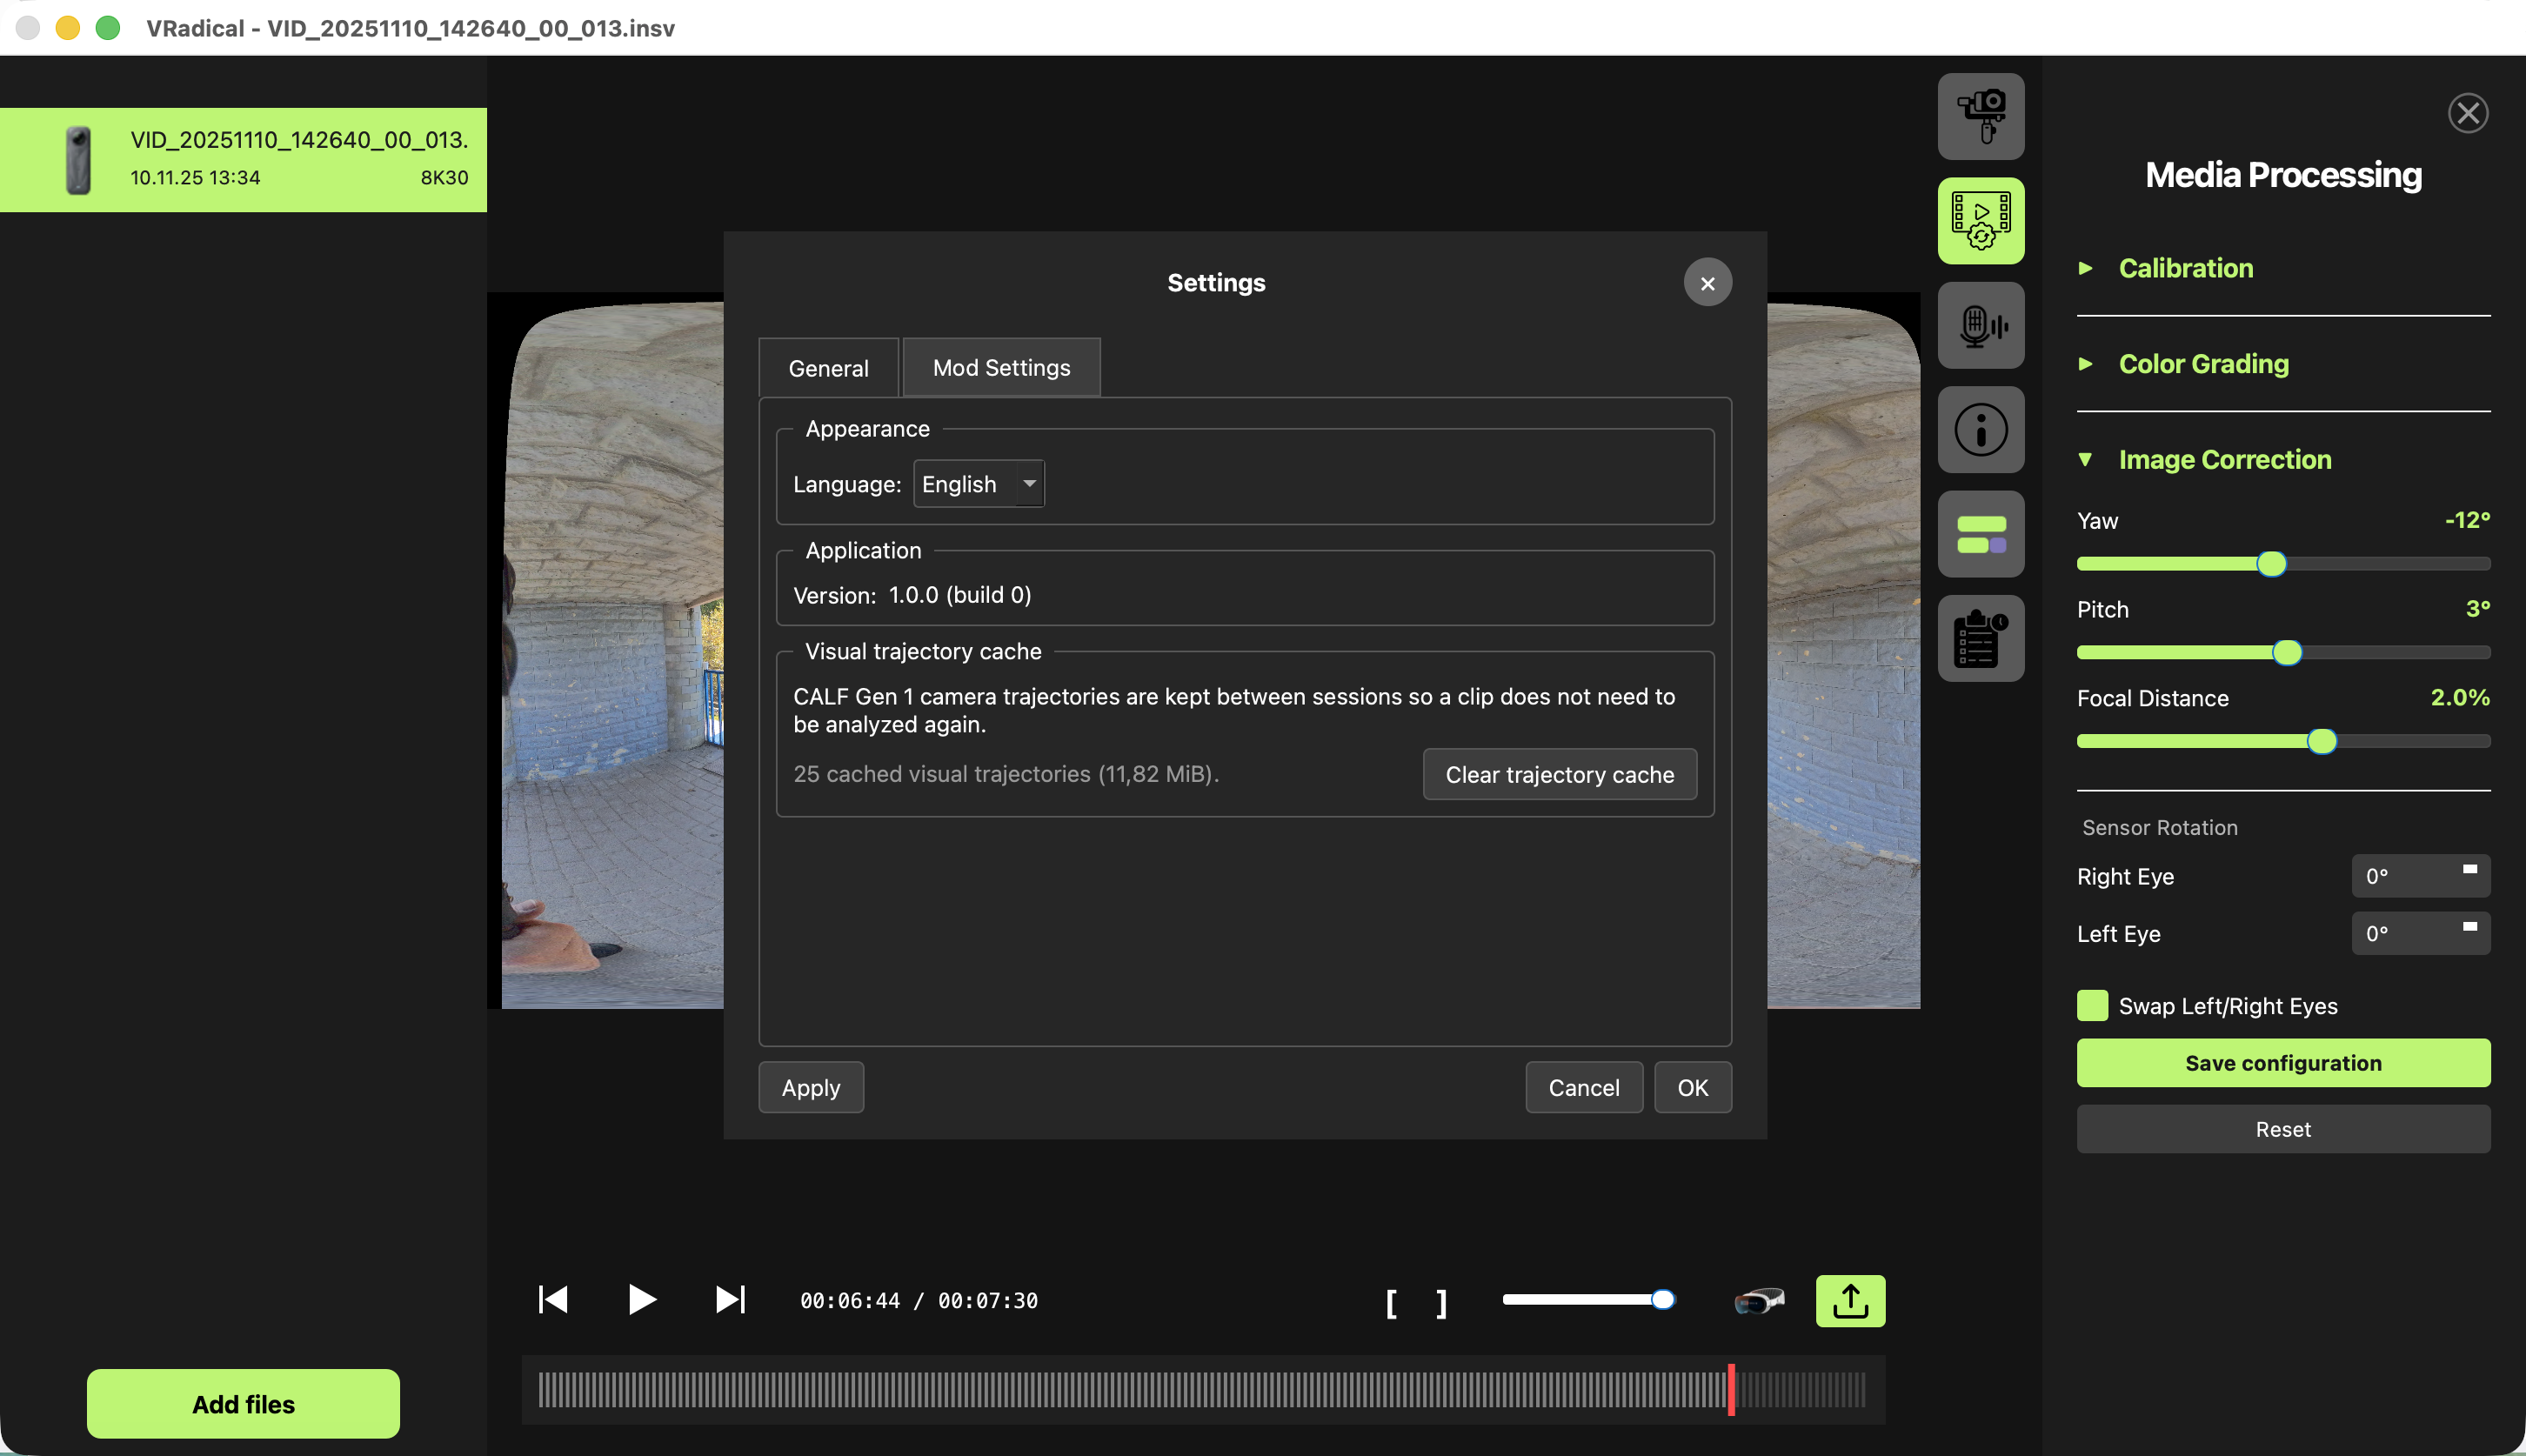
SCREENShared VRadical Settings chrome with interface language, version/build, and visual-trajectory cache maintenance.
General
Setting
Use
Open Settings
macOS: VRadical Studio > Preferences... or Cmd+,. Windows: File > Preferences....
Language
English is the current reference interface. Use localized variants only when supplied by the application-wide translation system.
Version / build
Use this when checking delivery notes or requesting support.
Visual trajectory cache
Shows reusable analyzed camera trajectories and their size.
Clear trajectory cache
Removes reusable analysis so affected clips will be prepared again next time.
Authenticated updates
1
Open Updates
In an updater-enabled customer build, choose Help > Check for Updates... or Settings > General > Updates.
2
Connect GitHub
Choose Connect. In Connect VRadical Studio to GitHub, use Copy Code and Open GitHub, complete the device flow in your browser, then return to Studio.
3
Choose automatic checks
Automatically check for updates is off by default. Enabling it shows a privacy consent before Studio contacts GitHub in the background.
4
Check
Use Check Now or Retry. The panel shows GitHub status and Last check without blocking the rest of Studio.
5
Download
Choose Download Update. Downloads are always user-initiated and the signed manifest is verified before installation is offered.
6
Install safely
Choose Install Update.... Studio waits for preview/export/streaming/calibration work to reach a safe state, then installs and relaunches.
Update control
Meaning
Connect / Reconnect / Disconnect
Manage the GitHub device authorization used only for this private distribution.
Check Now / Retry
Request the current release status immediately.
Download Update
Fetch the verified installer without installing it yet.
Install Update...
Hand off to the platform installer when Studio is safe to close.
Working... / Cancel
Shows an active update operation or requests a clean cancellation.
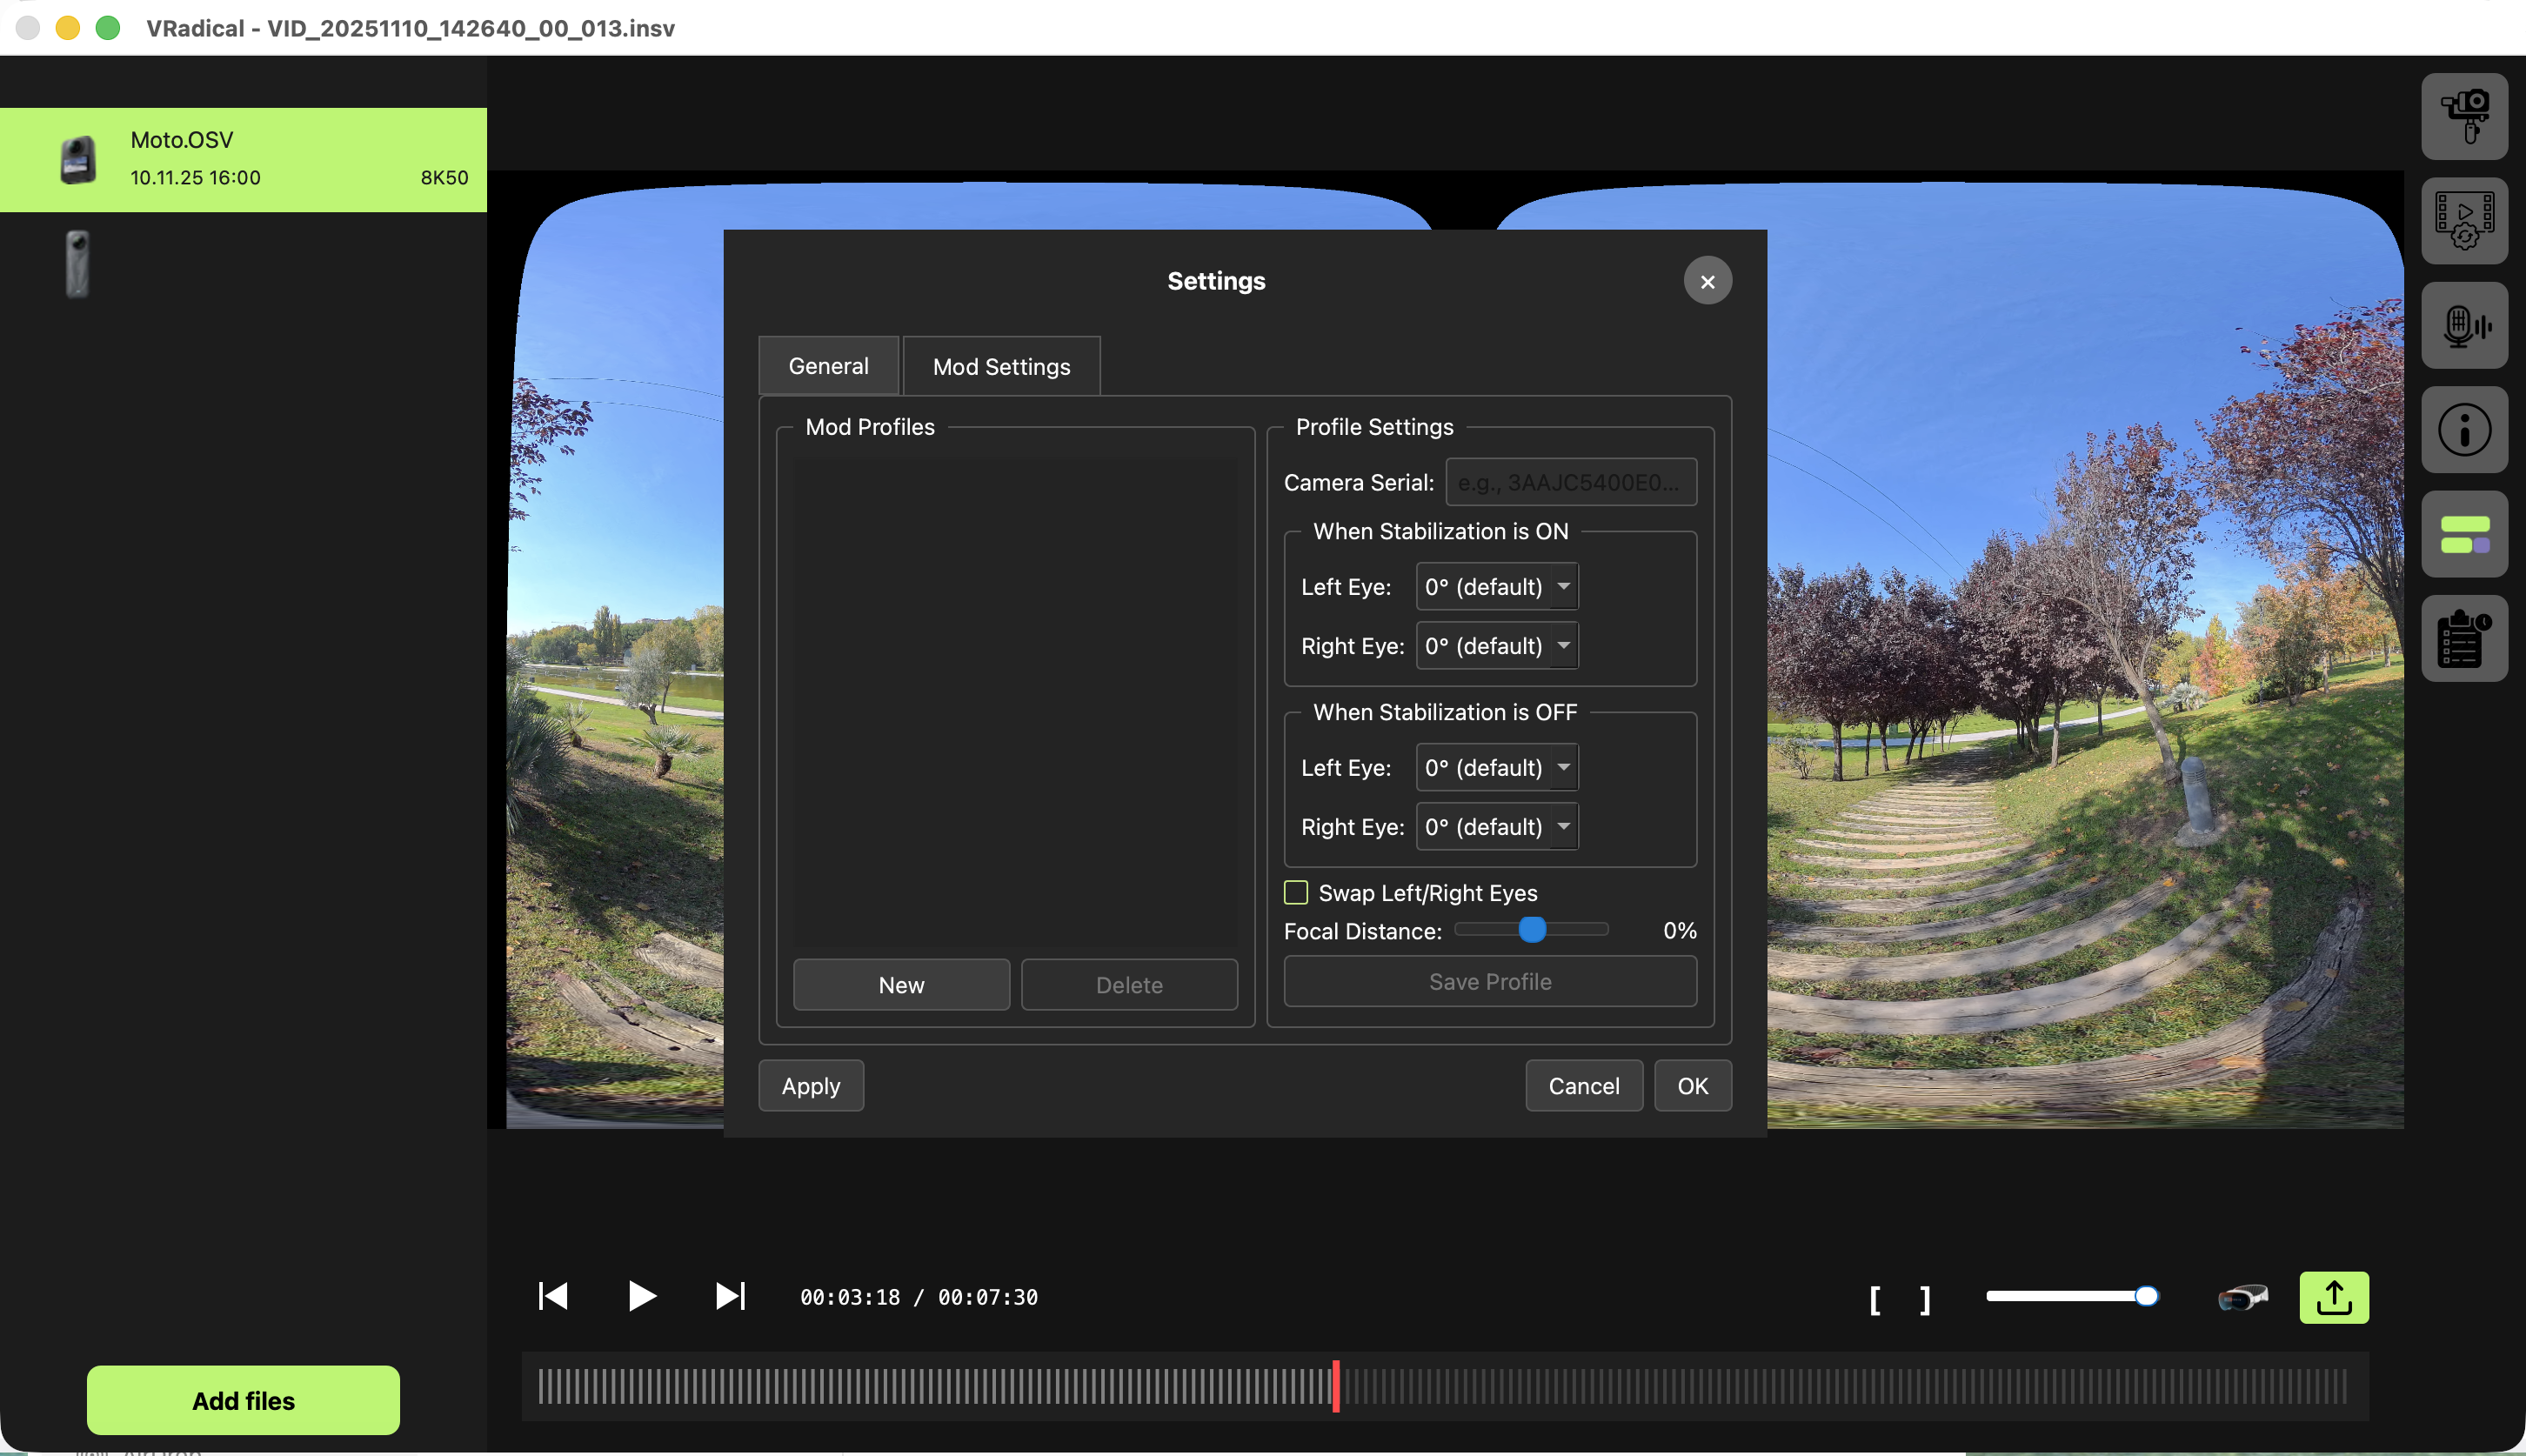
SCREENThe Mod Settings editor with a clean profile list and separate stabilization ON/OFF sensor orientation.
Create or edit a Mod profile
1
Open Mod Settings
Open Settings, then choose Mod Settings.
2
Choose New or a profile
Create a profile or select an existing camera serial from the list.
3
Enter the exact serial
Camera serial is a semantic identity. Preserve all characters and boundary whitespace exactly as supplied by Studio.
4
Set both stabilization states
Choose left/right cardinal sensor rotations for Stabilization ON and OFF.
5
Set eye order and focal distance
Use Swap Left/Right Eyes and the profile focal-distance default only when the physical rig requires them.
6
Save and Apply
Save Profile, then Apply/OK. A matching loaded camera updates immediately.
Where Studio keeps personal data
Data
Location / behavior
Calibration and Mod profiles
~/.vradical on macOS; the equivalent user profile location on Windows.
Imported LUTs
~/.vradical/luts.
Calibration scratch
~/.vradical/autocalibrate. Inactive sessions are purged; this is not a result cache.
Visual trajectories
Qt generic data location under VRadical/visual-trajectories/v2.
GUI and export profiles
Native Qt application settings for the current user.
DeoVR/JillVR passwords
macOS Keychain or Windows Credential Manager when used by those login flows.
GitHub updater credential
macOS Keychain or Windows Credential Manager. Tokens and account data are never written to Studio logs.
14
The same product rules, ready for repeatable jobs
Command line
The bundled vradical-cli uses the same shared settings models and camera registry as Studio. It is useful for inspection, scripted exports, Timeline rendering, photo output, and local DeoVR streaming.
--photo-format jpg|dng and photo-safe --resolution source
Insta360 1-inch
--one-r-inch-vertical selects the vertical 1-inch profile when applicable
15
Clear messages, practical next moves
Troubleshooting
Studio fails closed when a result would be misleading: wrong camera route, missing stereo correction, changed multipart identity, or unsupported hardware. Use the exact message and the table below before changing files or settings.
Message or symptom
What to do
Requires an Apple Silicon Mac
Move the job to an Apple Silicon Mac. There is no Intel/CPU preview mode.
VRadical Studio requires a compatible hardware Direct3D 11 GPU. On non-Apple Windows computers, the GPU must be NVIDIA, AMD, or Intel. CPU fallback rendering is disabled.
Install the current hardware-vendor driver, avoid a software adapter or remote fallback, and relaunch. A physical Apple computer running Windows may use its installed hardware GPU.
This file is not supported by this version of VRadical
Install a version that supports the source camera, or use media supported by the installed version. If the file should be supported, contact support with the untouched original and your exact Studio version.
This file is not compatible with this version of VRadical
The optional CALF Gen 1 source does not belong to this delivered edition. Install the matching customer edition.
Camera/media not authorized
Preserve the original and contact support with the camera serial shown by Studio.
Open one VRadical Timeline file at a time
Open a single .vradical-timeline project, then import any extra source media normally.
Calibration missing / invalid
Load the matching video, complete Auto-Calibration, and reopen the requested media.
Photo has no compatible calibration
For X5/X6, Q3U, or Mirage, calibrate a compatible video first. Q3U offers a serial chooser when needed; original Osmo 360 and R5 Mark II photos instead use transient correction.
Sensor orientation is ambiguous
Use a better scene or complete the guided manual ON/OFF orientation capture. Do not save a guessed profile.
Motion / rolling-shutter metadata incomplete
Return to the untouched camera original and its companion parts. The route intentionally refuses an incomplete trajectory.
R5 Mark II exact rolling-shutter proof is not observable or is ambiguous
Continue with the ordinary Canon stabilization trajectory. Studio remembers this valid per-clip result and omits exact row correction; it does not reject the source or disable global stabilization.
Canon packaged color resource is missing or invalid
Repair or reinstall the complete VRadical Studio package, then reopen the CRM/CR3 source. No separate EOS VR Utility installation is required.
Multipart OSV set is ambiguous or changed
Restore every original sibling, name/order, and stream-compatible member; then reload.
Logical media source changed after it was queued
Remove the job, reload the current complete source set, inspect it, and queue again.
Hardware encoder unavailable
Read the reported hardware error first. Try a supported rate, depth, resolution, codec, or current GPU driver. On Windows, turn off Hardware Acceleration only when you deliberately want the slower software encoder; Studio never switches to it silently.
RIFE initialization or memory failure
Try a shorter marked range or lower export resolution on a compatible GPU, then retry. Matching the source frame rate bypasses interpolation.
Flat projection or resolution rejected
Confirm the camera route offers Flat and enter a square-pixel 16:9 2D or 32:9 3D size within one source eye. Flat cannot use Vision Pro spatial codecs.
Advanced audio mode unavailable
Use None or Mute, or install an edition built with the audio DSP.
Output path invalid / already exists
Choose a writable folder. Studio can add -01, -02, and later suffixes to avoid collisions.
DeoVR server cannot listen
Choose another port and check local firewall/network rules.
vradical-cli was not found
Reinstall the complete application bundle/installer; do not move the CLI out of its package.
GitHub connection expired or rejected
Open Settings > General > Updates, choose Reconnect, and complete the device flow again. Do not share the device code.
Update download or verification failed
Choose Retry on a trusted network. Do not bypass signature/manifest verification or run a partially downloaded installer.
Install Update is waiting
Finish or cancel active export, streaming, calibration, or other unsafe work; Studio installs only after it reaches a safe state.
Export failed
Open Export Queue, choose Show Error, correct the root cause, then Retry.
Collect useful diagnostics
1
Record version/build
Open Settings and note the exact version and build.
2
Record the action
State whether the failure happened during import, preview, calibration, Timeline, export, publish, or streaming.
3
Copy the exact error
Use Show Error in the queue or copy the complete popup text.
4
Attach the latest session log
Studio keeps the terminal output and also writes a bounded persistent log for every run. On macOS, open ~/Library/Application Support/VRadical/logs. On Windows, open %LOCALAPPDATA%\VRadical\logs. Choose the newest studio-* folder and include its .log files.
5
Review before sharing
Support logs can contain media paths, calibration paths, camera serials, and non-secret processing settings. The logging layer does not add environment variables, OAuth codes, passwords, or tokens. Redact any remaining path or serial you do not want to disclose.
Before contacting support
CHECKKeep the original camera file and all companion/multipart members.
CHECKDo not transcode the failing source.
CHECKNote the camera model, exact serial, Studio version/build, operating system, and GPU.
CHECKInclude the exact route: preview, calibration, photo, Timeline, export, publish, or DeoVR.
CHECKInclude the exact error and the smallest reproducible range.
CHECKContact ChelouteVR via reddit u/cheloutevr or email cheloute.vr@gmail.com when the installed build instructs you to do so.
16
The page you will come back to
Shortcuts and reference
Use these verified shortcuts and checklists to move quickly. Shortcuts are context-sensitive: Timeline editing keys work while the Timeline editor has focus.
Global shortcuts
macOS
Windows
Action
Cmd+O
Ctrl+O
Open supported files
Cmd+,
File > Preferences...
Open Settings
Cmd+Q
Ctrl+Q
Quit Studio
Timeline shortcuts
Shortcut
Action
Esc
Leave Cut mode
Cmd/Ctrl+Z
Undo
Cmd/Ctrl+Shift+Z or Cmd/Ctrl+Y
Redo
C or B
Split selected video at playhead
Delete or Backspace
Remove selection
M
Mute selected video
+ or = / -
Zoom in / out
Left / Right
Move one frame
Shift+Left / Shift+Right
Move ten frames
Cmd/Ctrl+Left / Cmd/Ctrl+Right
Move one second
Up / Down
Previous / next edit point
Home / End
Timeline start / end
J / K / L
Reverse shuttle / stop / forward shuttle
I / O
Mark In / Out
Alt+I / Alt+O
Clear In / Out
Final export checklist
CHECKThe correct camera/profile appears in File Properties.
CHECKCalibration is loaded and both eyes align in near, mid, and far regions.
CHECKSensor rotations and eye order match the final SBS viewer convention.
CHECKStabilization behaves correctly at the start, fastest motion, and end.
CHECKYaw, pitch, and focal distance do not reveal unintended source borders.
CHECKLUT and tonal controls look consistent in both eyes.
CHECKAudio mode and monitoring volume are intentional.
CHECKIn/Out points or Timeline duration are correct.
CHECKProjection, aspect ratio, resolution, frame rate, codec, depth, bitrate, and metadata match the destination. Check whether a higher frame rate has selected RIFE.
CHECKA short sample export has been checked in the target player/headset.
CHECKThe final output folder has enough space and the queue is monitored through completion.
Fast glossary
Term
Definition
CFA
Color filter array data in some RAW photo sources. Processed SBS DNG output is rendered linear RGB, not a CFA copy.
D3D11
Direct3D 11, the required native Windows GPU backend.
EAC
Equi-angular cubemap camera layout used by supported GoPro profiles.
HLS
HTTP Live Streaming, used for the local DeoVR stream.
LUT
A 3D color lookup table stored as a .cube file.
Mod profile
Persistent physical camera setup for sensor rotations, eye order, and focal-distance defaults.
P010
10-bit 4:2:0 YUV GPU format used by high-depth native paths.
RIFE
GPU frame interpolation automatically used when the selected video export rate exceeds a source clip's rate.
Flat 2D / 3D
Rectilinear video exports: a single 16:9 eye or two 16:9 eyes in a 32:9 SBS frame.
SBS
Side-by-side stereo output, left eye followed by right eye.
VR180
A stereoscopic 180-degree immersive view.
No matching chapter
Try a camera name, calibration, export, Timeline, photo, CLI, or DeoVR.